Archive for the 'Making stuff' Category

Time is Tight

Posted by on April 20th 2009 in Making stuff, Projects, Video (YouTube, Vimeo etc.)

Apologies for the lack of regular blogging - there just aren't enough hours in the day. There's been no time for hiking or star-gazing, but to be fair we did manage to take a few hours off for a walk around Bosworth Park last Monday (which reminds me that I still have to upload the pics from that).

After two weeks of school holidays, I've a backlog of stuff to shift...

  • At least three trailer-trips to the local tip (sorry, recycling centre) for my waste, and another trip for my dad's stuff;
  • Setting up eBay and PayPal seller-accounts for a friend;
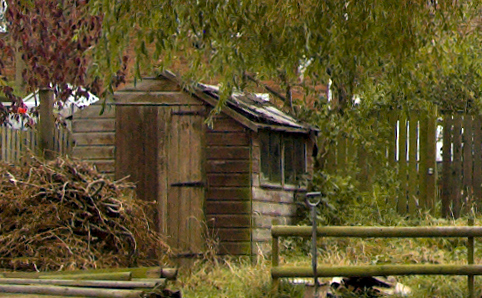
  • Fitting-out the old shed;
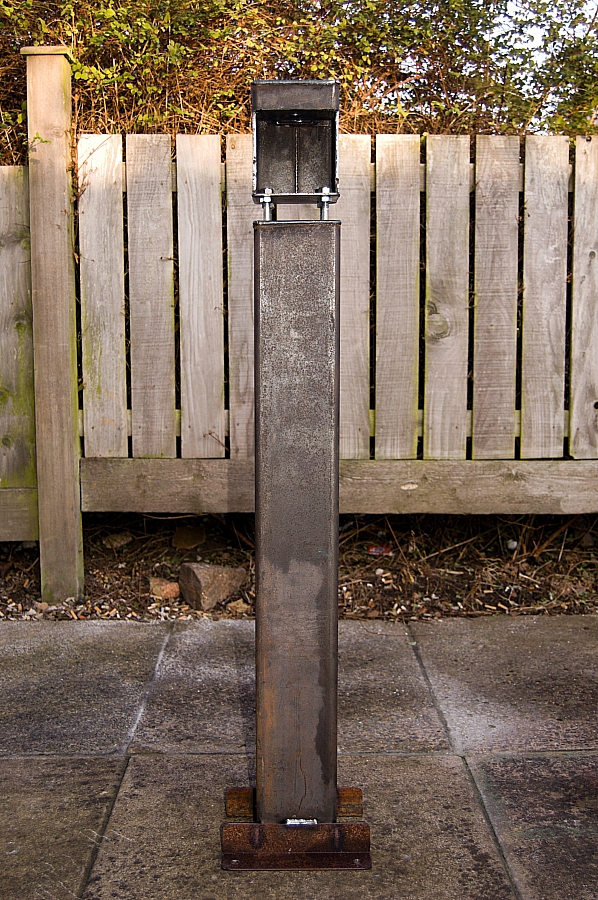
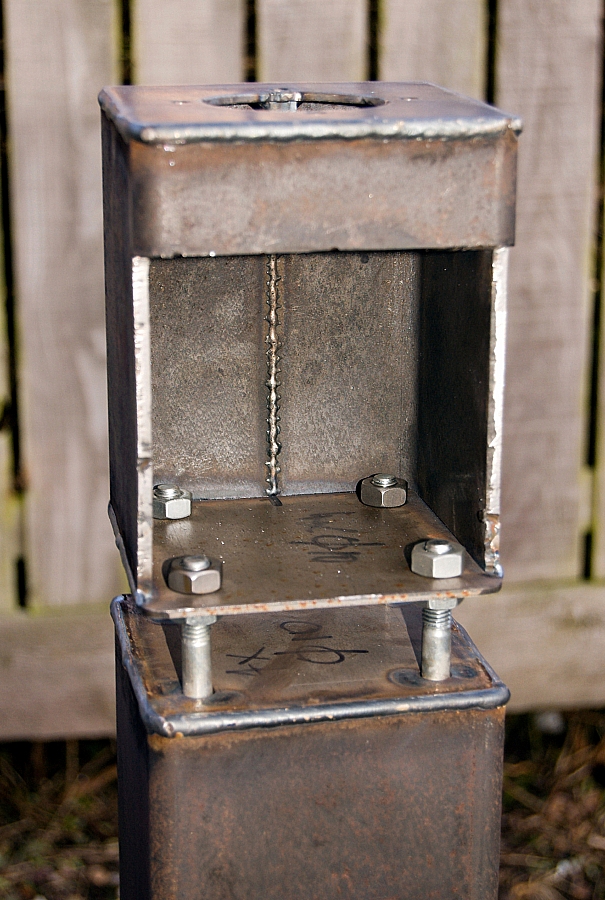
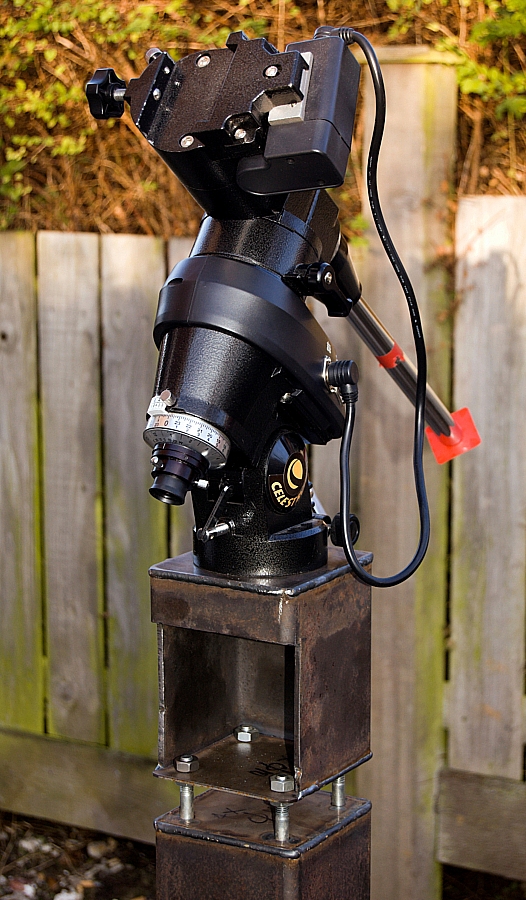
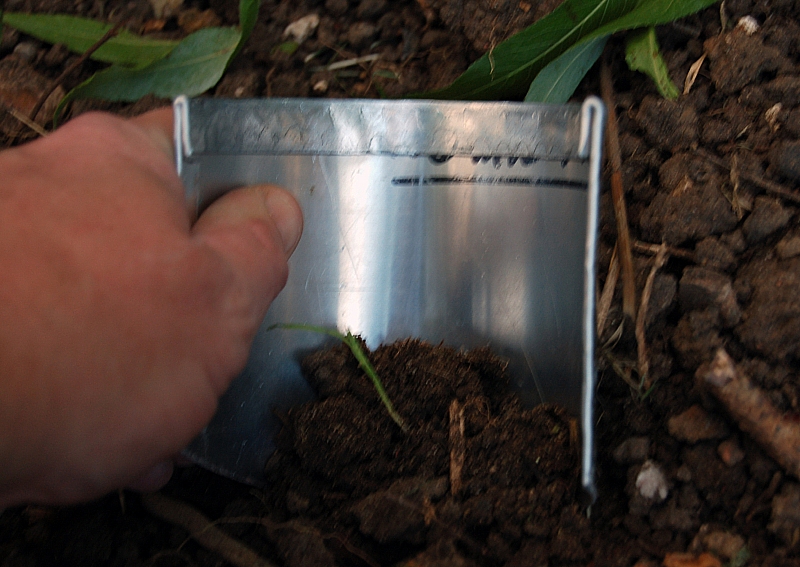
  • Digging out a 1m cube of soil/subsoil to take the foundation for the telescope pier;
  • Driving in several 2m steel rods to anchor into the clay subsoil;
  • Hand-mixing 850kg of concrete to refill said hole;
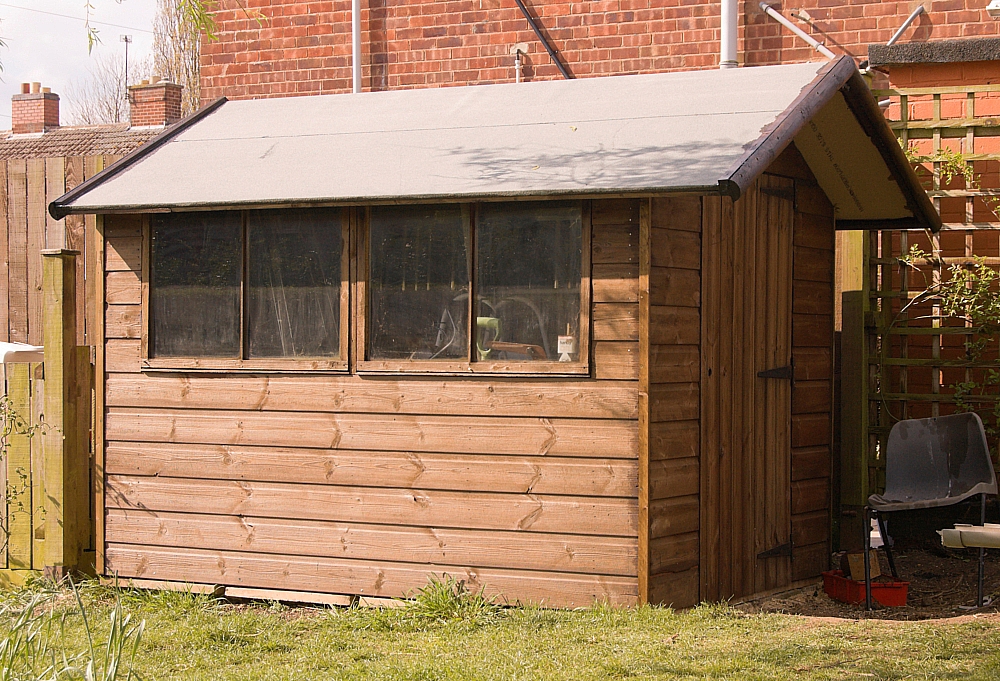
  • Installing footings for a 7ft x 7ft observatory-shed around said hole and pier;
  • Building said observatory;
  • Fitting a new garage door for my dad;
  • Getting the microwave oven fixed;
  • And all of the mundane everyday stuff that we all have to endure.

Never mind, we're looking forward to a carefree weekend, so it's not so bad.

A little chill-music would seem to be in order:

Reconditioned, runs like new

Posted by on April 13th 2009 in Making stuff, Projects

Our old knackered hut had given good service but was suffering from a tad (well, more like thirteen years) of neglect, as you can see in the following pic taken last autumn:


The offending shed, dwarfed by our Salix babylonica and by the bonfire-fuel.


Deadwood.


The roof was, er, partial, and had let in so much rain that the floor and bearers had rotted, but the T&G shiplap sides were mostly sound. The choice was simple - repair or replace. Well, I'm not one for wasting £400 of cash, so we went off to B&Q, discount card in hand, and raided their timber and board stocks. A week later, after a jet-wash and much sawing and screwing, the thing now lives a bit closer to the house and looks like this:


Revamped.


It's shrunk a bit - we had to trim 5" of rot off the bottom edge, and we shortened the length by 5" so that we could use 2400mm timbers and boards instead of having to buy and trim 10-footers. Now the floor and roof are better than they ever were when it was new, and it's been fully double-proofed inside and out.

Not bad, eh? And there's enough change from the budget to buy a few beers, which are well-deserved.

I reckon I'm getting the hang of this recycling malarkey.

Knobs, flocking and scum

Posted by on March 12th 2009 in Astrostuff, Making stuff
The skies here have been bad for observing for many weeks, and on Monday there was no sign of it getting better during the next few days, so I decided that it was high time that I serviced the scope ready for the rest of the year. I knew that I was going to have to take the thing apart completely, so it was worth doing any major work in one go, rather than faff about doing it week-by-week. The first job was the flocking of the inside of the tube. As supplied, the inside is sprayed with some sort of matt grey paint, and to be honest I've seen better paint jobs on Army Landrovers. Imagine Stevie Wonder repainting the stone-chips on your car using a paint-filled fire-extinguisher and you'll get some idea of what I'm on about. The paint does a mediocre job of cutting down on internal reflections, but it's not brilliant and if there are any scratches in it the reflected light can spoil an observing session. So, I got hold of a couple of sheets of self-adhesive black flocking "paper" from Edmund Optics and set about dismantling the scope. The mirrors were safely boxed and stashed away from all danger, and the rest of the fittings were removed, labelled and stored accordingly. The flocking operation was fiddly but there were no major problems, aside from wrestling with the incredibly tenacious adhesive when the sheet wasn't quite in the right place.  

A flocking brilliant job

  The second job was the replacement of the collimation screws for the mirrors. I get annoyed that I need three tools to do the adjustments (the primary mirror needs a hex key for three grub-screws and a cross-head screwdriver for three countersunks, the secondary needs a different hex key for three other grubscrews) so I decided to replace the lot with something a bit more user-friendly. A lot of folk go in for the expense of "Bob's Knobs" which are thumbscrews and hence require no tools, but there's a problem at the back end of a Celestron Newtonian - the "pushmi pullyu" screw-pairings on the primary cell are pitched at only 12mm, so large-headed thumbscrews would clash. Besides, they're expensive for what they are, and I'm a cheapskate, so I opted for stainless Phillips panheads. The problem was, what size to get? I emailed the scope's manufacturer with the following question: "Please can you tell me the thread sizes/specifications for the 3 sets of 3 collimation screws (6 on the primary, 3 on the secondary) on a 2007 C8N (the version with the thin-vane spider)?" and received the following reply: "Unfortunately the screws will be different because of various vendors that supply them. So we do not have specs on these. Thank you, Celestron Technical Services" Wow, that was a lot of help. Not! Whatever happened to the idea of standardisation? I had to resort to cadging some thread-gauges. M5 for the primary grubs, M4 for the secondary. A quick order to Stagonset resulted in the swift delivery of two dozen stainless screws various and change from a fiver. The six screws that I actually used (I didn't bother replacing the three cross-head countersunks) were 3-off M4 x 25mm @ 9p each and 3-off M5 x 12mm @ 12p each - simple, effective and way cheaper than posh knobs. Now the only tool required is the small Phillips screwdriver that was supplied with the scope. Sorted.  

New screws for the primary

New screws for the secondary

  Of course, using panheads instead of inset grubs for the primary meant that the rear mirror cover no longer fitted, so I ditched it and went for an open-ended setup. This is supposed to be a good thing anyway, as it allows quicker mirror-cooling and cuts down on thermal currents in the tube. The screw-holes for fixing the cover were opened out and tapped so that I could fit a set of rubber feet for the tube to stand on.  

Showing some (gl)ass!

  The last job before the rebuild was the cleaning of the mirrors. So many folk say that you needn't keep them fastidiously clean, but mine were caked with scum. They both had a bath in warm soapy water and a flush-off with distilled water before being rehoused. It was during that process that I confirmed that there was something odd about the primary mirror - the centre-marker wasn't central, as I've long suspected, as it explains why I've often struggled to get the scope collimated correctly. It needed to be fixed. I cut out a disc of paper the same size as the mirror and cut the centre out of it to make a template. Using it as a mask to protect the mirror, I gently peeled off the self-adhesive marker-ring and then stuck it back on in the right place - a full 5mm from where it had been. No wonder collimation had been a dodgy affair!

The properly-centred marker, complete with the scar where it was moved from.

  Anyway, after the rebuild was complete I did a full laser-collimation within 5 minutes and the results were better than ever. All I need now is a clear night to do a star-test and all should be well. Progress with the pier continues apace, but I'll tell you about that in a separate post.

Pier pressure

Posted by on December 3rd 2008 in Astrostuff, Making stuff

Monday evening was spent at the pub(s) with Nick, putting the world to rights and pretending to be professional bar-billiards players. Among the many topics of conversation, we returned to a couple of old favourites - telescopes and the night sky. We had discussed telescope piers before and had done a bit of research, so we decided that it was time to make our first prototype.

The next morning, with a dog-eared sketch in my hand and a dog-eared pair of steelies on my feet, I went to see the Nick at his business premises - it was time to play with the 5mm steel. Four hours later, after 2 hours of work and several brews, we stood back to admire our handiwork. It's rough-and-ready at the moment, we're not going to get it galved and painted until we're sure that it's up to the job, so after I've concreted it into the garden I've got to do some flexure, resonance and vibration-damping tests on it. This could take some time, so don't expect regular reports, but when we do get it right we'll let you know.


Now, where did I put that spade?


Reservoir dog

Posted by on July 8th 2008 in Making stuff, Shiny new kit, Thanks

The first prototype fuel tank is now undergoing leak-testing.

Like most DIY gadgets, it's a doddle to make if you've access to all the bits and the kit to put them together. I'll take this opportunity to thank my good friend Nick, who lets me use his business premises and kit whenever I ask, in return for beer. Cheers, Nick!

The ingredients are as follows:

  • 1-off 185g tin of tuna flakes (this size will hold 200ml of fuel)
  • 1-off M8 rivnut and installing-tool
  • 1-off 11mm steel washer
  • 1-off M8 bolt (this prototype uses a steel bolt, I'm trying to scrounge a suitable plastic one)
  • Some solvent-resistant plastic film to make 2-off 11mm and 1-off 8mm sealing-rings (I used the flexible pouring-spout from a drum of thinners)

The method is as follows:

  • Remove the label from the tin
  • Use a trepanning drill-bit to make an 11mm diameter hole in the side of the tin. Standard-tipped HSS drill-bits mangle the tin
  • Remove the tuna, a straw's good for this. This is the most time-consuming part of the job.
  • If you don't mind the taste of swarf, eat the tuna
  • Wash out the tin
  • Put an 11mm sealing-ring, then the washer, then another 11mm sealing-ring onto the shank of the rivnut
  • Push this lot into the hole then use the installing-tool to fix the rivnut and bits into the hole
  • Fit the 8mm sealing-ring to the bolt to make a plug
  • Fill, seal and test

The good news is that you can't just pour out the contents - you have to gently squeeze together the top and bottom of the tin to pump out the fluid. Short controlled bursts, as the saying goes.

The bad news is that you can't get the last few dregs (approx 10ml) out of the tin, due to the depth to which the rivnut is inserted.


Right, now you've stopped laughing, here's what it looks like:


I'll let you know the test-results as and when. So far, it's looking OK.

Wassat? #2 – 3 for the price of one

Tags:
OK, time for me to fess up. Last time I was out on a wildie, I lost one of my standard-issue U-Dig-It folding trowels. Well, actually, it's not really lost, it's within 20 yards of the summit of Kentmere Pike, but I'm damned if I'm going back for it. Anyway, I considered buying a replacement, but had second thoughts. You see, I'd been tinkering with a prototype titanium version for a while, but never got around to finishing the job (no pun intended). Then I got to thinking about those times when I want to go lightweight and give the Jetboil PCS a rest. Mike Bell had kindly distributed free samples of his beer-can stoves (pic) during the OM Beddgelert Meet, and I was keen to try out mine. The only thing missing was a pot-stand and somewhere to stash it. So I came up with this idea. A digging tool, stable pot-stand and windshield all in one. And just for good measure, it fits neatly into my Alpkit Mytimug, leaving plenty of room for other stuff. It's been suggested that it could be used as a mouse-trap, but frankly I fear for the sanity of anyone who could conceive such an idea. This prototype's made from 1mm aluminium alloy, cut with secateurs, folded over the doorstep, neatened up with a Brummie screwdriver and curved by forming it around the drainpipe on the side of the house. OK, so it's rough-and-ready, but it works well enough to prove that the idea's worth following up. The next version will be in a decent grade of 0.5mm stainless steel and made with proper tools. I'm not sure if it's worth wasting good titanium on a final version, but time will tell. Anyway, here's the pics and stuff, sadly there are none of it in use with the beer-can stove, as it's been terminated (I stood on it by accident):  

Dig with the pointy end downwards. Use 2 hands. Think "SnowClaw" and you'll get the idea.


Stick the pointy end into the ground to stop it falling over. It's more stable than it looks.


A neat fit inside the Alpkit Mytimug.