Archive for the 'Astrostuff' Category

Pragmatism and Purism lose out to Painkillers and Purlins

Posted by on May 28th 2009 in Astrostuff, Health, or lack thereof, Making stuff, Projects

The Coniston Fells rematch has had to be postponed due to my lack of confidence that my back will stay the course. It's a great disappointment on several levels, not least because I was hoping to take Ella with me for her first wildie. MWIS predicts that the weather's going to be really good over the weekend, so it would have been a great opportunity to introduce her to a couple of days and nights without most of the techno-trappings of life as she knows it.

Never mind, there'll be plenty of other chances.

It looks like I'll be taking it easy and finishing the observatory roof and the bathroom refurb instead.

There's no peace for the wicked, eh?

Observatory progress – Phase 6

Posted by on May 24th 2009 in Astrostuff, Making stuff, Projects

OK, we now have the beginnings of a roof, thanks to the help provided by Ella during the last two days:


Tomorrow we'll see if it fits.

Observatory progress – Phase 5

Posted by on May 22nd 2009 in Astrostuff, Making stuff, Projects

Construction of the observatory continues apace, mainly due to a complete disregard for the useless instructions included with the parts. Phase 5 is now complete:
 
The sides were double-proofed inside and out before assembly, and the few gaps have been filled with mastic. The walls are now up, square and level, cross-braced where required and fixed with many more than the recommended number of screws. The instructions said to put the walls onto the floor panels, but that's just mad - if ever the flooring had to come up, the walls would have to be taken down first, which would mean taking the roof off (if fitted). Commonsense said to put the walls directly onto the floor-frame (see previous post) and then fit the floor inside.
 
The supplied 9mm OSB floor-sections were dismantled and their boards, along with the 9mm OSB roof-boards, were used to line the inside of the walls.
 
A proper 18mm "waterproof" T&G chipboard panel floor was fitted, complete with a lift-out section surrounding the pier to allow easy access to the fixing malarkey and the concrete foundation beneath it.
 

obsystitch


obsmay003


The coming week should see the completion of Phase 6 - the fitting of the roof, which should be a masterpiece of timber over-engineering.

Time will tell.

Observatory progress – Phases 2, 3 and 4

Posted by on May 1st 2009 in Astrostuff, Making stuff, Projects

Readers may remember that Nick and I constructed a prototype telescope pier way back in December. If you want to see what it looked like at the time, the post is here.

Well, that was Phase 1, and since then there have been developments...

Phase 2 (the move from prototype to working sample):

First up, preliminary tests indicated that the dimensions were OK but the ad-hoc angle-iron mountings were inadequate. We knew that they would have to be replaced, as they were only used as a temporary measure in order to allow flexure, resonance and vibration-damping testing. As you can see, they've been replaced with something a bit more substantial.

Second, a large hole was drilled in the side to allow sand-filling to dampen any excessive vibes. We also put a few M6 tapped holes in the side to allow for any future need for attaching brackets, gadgets, earth-tags and other such things.

Third, the whole shebang (apart from the threads) was phosphated and powdercoated which looks neat and should preserve the thing for quite a few years.

Phase 3 (the installation of the pier) was completed a week ago. After the ball-aching job of making a deep and heavy concrete base (see here) the pier was nutted onto the set-in studding, and a base of old slabs was put down around it to support the bearers.

Phase 4 is now complete - the construction of a sound raised floor-frame. To replace the somewhat inadequate floor that (eventually) came with the new shed, I made a frame of 4x2s which has been given several liberal coats of preservative. This frame sits on bearers (some old 3x3 fence-posts) which should last a few years before they rot. These bearers are not fixed, so they can be replaced one at a time if necessary - they cost nowt when "acquired" from the local tip.

Here are a few snapshots of the project so far:

The revised mounting-plate nutted to the studding in concrete base

The slabs have it surrounded!

The floor-frame supported by bearers (old fence-posts)

Phase 5 will be interesting - it's the bit where we assemble the shed walls. Now, if only I had a full set...

Fiddler’s elbow

Posted by on March 24th 2009 in Astrostuff, Congratulations!, Health, or lack thereof

Just because I was named after a famous violinist shouldn't mean that my life has to be up and down like the proverbial fiddler's elbow, but just lately that's the way it's been.

I'm now about to start week two of a bitch of a cold, which I caught after a pleasant evening of beers with Nick and Steve. Personally, I blame the guest brew. Other may well be more specific and blame the quantity of the guest brew, but I couldn't possibly comment. Either way, it's having a prolonged effect. I've missed so many things over the last fortnight that I'm considering rebooting the calendar and starting again at Jan 1st, and giving it another shot.

The first "miss" was Titan's transit of Saturn on the 12th, which couldn't be seen directly here but which I was going to watch from an antipodean site via the web. Titan transits like this don't happen very often, as they only occur when Saturn's equatorial plane is roughly in line with the Earth, and it'll be ages before I get another chance. If you're interested, there's a pic and a cool movie of the Feb 24th transit over at http://heritage.stsci.edu/2009/12/index.html, reproduced here (with permission):

After four days of living under a duvet, I managed to crawl out to attend a family get-together on Sunday to celebrate the 80th birthday of my mother-in-law, but the day after that was spent undercover again.

On Tuesday I had no choice, as I had to spend most of the day at the local A&E due to "unusual circumstances". Wednesday was pretty much the same.

Thursday and Friday were more duvet-days, which meant that I missed my chance to don the "Father Jack" costume at what turned out to be an excellent fancy-dress birthday party for a good friend, but there was no way that I was going to miss Saturday's pool-party celebrations for our Annabelle's 10th birthday:


Mother's Day was spent at home feeling rough, which meant that Chris was a bit short-changed when it came to celebrating her day, and I didn't get over to see my mum either, so I've a lot of grovelling and catching-up to do this week.  😐

Anyway, I'm on the mend now. Even the boiler-fixing man says that I'm on the up, and he should know - he's been here three times during the last few weeks wrestling with (and losing to) our unruly Halstead Quattro, which has decided to play up now that it's a teenager.

Let's hope that tomorrow's better, and that the boiler gets fixed soon thereafter.

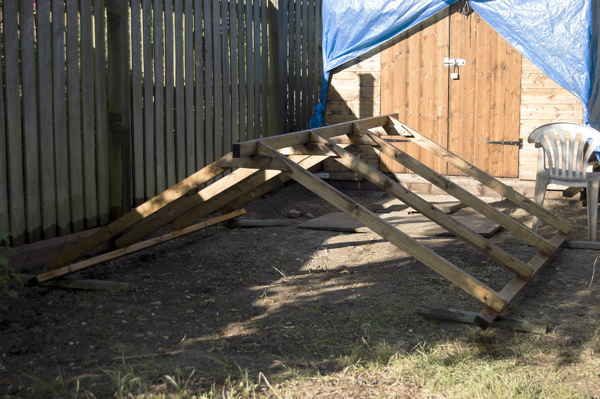
Of course, all this means that dates for our annual wildie, originally scheduled for sometime during the next two weeks, have had to be reconsidered.

I'm off to do some more coughing. Bye for now. :sad:

Knobs, flocking and scum

Posted by on March 12th 2009 in Astrostuff, Making stuff
The skies here have been bad for observing for many weeks, and on Monday there was no sign of it getting better during the next few days, so I decided that it was high time that I serviced the scope ready for the rest of the year. I knew that I was going to have to take the thing apart completely, so it was worth doing any major work in one go, rather than faff about doing it week-by-week. The first job was the flocking of the inside of the tube. As supplied, the inside is sprayed with some sort of matt grey paint, and to be honest I've seen better paint jobs on Army Landrovers. Imagine Stevie Wonder repainting the stone-chips on your car using a paint-filled fire-extinguisher and you'll get some idea of what I'm on about. The paint does a mediocre job of cutting down on internal reflections, but it's not brilliant and if there are any scratches in it the reflected light can spoil an observing session. So, I got hold of a couple of sheets of self-adhesive black flocking "paper" from Edmund Optics and set about dismantling the scope. The mirrors were safely boxed and stashed away from all danger, and the rest of the fittings were removed, labelled and stored accordingly. The flocking operation was fiddly but there were no major problems, aside from wrestling with the incredibly tenacious adhesive when the sheet wasn't quite in the right place.  

A flocking brilliant job

  The second job was the replacement of the collimation screws for the mirrors. I get annoyed that I need three tools to do the adjustments (the primary mirror needs a hex key for three grub-screws and a cross-head screwdriver for three countersunks, the secondary needs a different hex key for three other grubscrews) so I decided to replace the lot with something a bit more user-friendly. A lot of folk go in for the expense of "Bob's Knobs" which are thumbscrews and hence require no tools, but there's a problem at the back end of a Celestron Newtonian - the "pushmi pullyu" screw-pairings on the primary cell are pitched at only 12mm, so large-headed thumbscrews would clash. Besides, they're expensive for what they are, and I'm a cheapskate, so I opted for stainless Phillips panheads. The problem was, what size to get? I emailed the scope's manufacturer with the following question: "Please can you tell me the thread sizes/specifications for the 3 sets of 3 collimation screws (6 on the primary, 3 on the secondary) on a 2007 C8N (the version with the thin-vane spider)?" and received the following reply: "Unfortunately the screws will be different because of various vendors that supply them. So we do not have specs on these. Thank you, Celestron Technical Services" Wow, that was a lot of help. Not! Whatever happened to the idea of standardisation? I had to resort to cadging some thread-gauges. M5 for the primary grubs, M4 for the secondary. A quick order to Stagonset resulted in the swift delivery of two dozen stainless screws various and change from a fiver. The six screws that I actually used (I didn't bother replacing the three cross-head countersunks) were 3-off M4 x 25mm @ 9p each and 3-off M5 x 12mm @ 12p each - simple, effective and way cheaper than posh knobs. Now the only tool required is the small Phillips screwdriver that was supplied with the scope. Sorted.  

New screws for the primary

New screws for the secondary

  Of course, using panheads instead of inset grubs for the primary meant that the rear mirror cover no longer fitted, so I ditched it and went for an open-ended setup. This is supposed to be a good thing anyway, as it allows quicker mirror-cooling and cuts down on thermal currents in the tube. The screw-holes for fixing the cover were opened out and tapped so that I could fit a set of rubber feet for the tube to stand on.  

Showing some (gl)ass!

  The last job before the rebuild was the cleaning of the mirrors. So many folk say that you needn't keep them fastidiously clean, but mine were caked with scum. They both had a bath in warm soapy water and a flush-off with distilled water before being rehoused. It was during that process that I confirmed that there was something odd about the primary mirror - the centre-marker wasn't central, as I've long suspected, as it explains why I've often struggled to get the scope collimated correctly. It needed to be fixed. I cut out a disc of paper the same size as the mirror and cut the centre out of it to make a template. Using it as a mask to protect the mirror, I gently peeled off the self-adhesive marker-ring and then stuck it back on in the right place - a full 5mm from where it had been. No wonder collimation had been a dodgy affair!

The properly-centred marker, complete with the scar where it was moved from.

  Anyway, after the rebuild was complete I did a full laser-collimation within 5 minutes and the results were better than ever. All I need now is a clear night to do a star-test and all should be well. Progress with the pier continues apace, but I'll tell you about that in a separate post.