Archive for the 'Astrostuff' Category

Perseid party-pooper

Posted by on August 13th 2009 in Astrostuff

According to the weather forecast on Monday, the night skies were to be fairly cloudy on Tuesday and mainly clear on Wednesday. Sadly, it didn't turn out that way. On Tuesday night there were plenty of clear spells during which I managed to sneak out for a quick look around, and there were plenty of Perseid meteors about. I wasn't set up for taking pics, as my camera was off-line due to a sensor-cleaning session. I figured that I could wait another day.

Last night's planned observing session turned out to be a waste of time, as we had fairly comprehensive cloud-coverage here all night. True, there were a few gaps through which the odd trail could be seen, and the clag was thin enough to see when a passing meteor was lighting up the tops of the clouds, but there was no point in setting up the camera.

According to the current forecast there's not much chance that I'll catch the tail-end of the show tonight.

Next year, maybe?

Observing Report 20th-22nd July 2009 (Jupiter and Io)

Posted by on July 24th 2009 in Astrostuff, Observing Reports
Observing reports have been neglected a bit for a while now while I've being commissioning the observatory. This process has included:
  • Getting the mount drift-aligned so that its axis of rotation is aligned as closely as possible with that of the Earth;
  • Setting up the Shoestring EQDIR to control the mount via planetarium software on the laptop;
  • Setting up the Logitech Cordless RumblePad 2 as a wireless hand-controller;
  • PEC training - measuring the inherent periodic error of the mount gearing to allow the software to compensate for it.
Anyway, Monday night was the first time I'd used the place in anger, so to speak. There had been rain (see here) and there was still a fair bit of patchy low cloud around, but the seeing was reasonably good. I decided to have a peek at Jupiter. It's quite low in the southern sky just after midnight, so there was always going to be a fair bit of atmospheric dispersion to mess up any imaging, and some hazy high cloud didn't help either, but I needed to give it a go to "prove out" the mount alignment and stability. I shot just the one .avi file with the webcam on a general setting, needing the image shape and drift rather than any great detail. Happy that the mount setup was satisfactory, I decided to process the .avi as a check of the webcam's performance. The resulting image is  below:  

Io emerging from behind Jupiter, with Europa a bit further out

I was pleased to have captured Io right on the limb of Jupiter, but I've made a right botch of the planetary processing, which isn't surprising bearing in mind the settings used for capture. Even so, it proved that the webcam is still up to scratch. Given the choice of reprocessing or shooting more video, I went for the latter. The next night I was set up in good time, ready and waiting to take advantage of any gaps in the clouds. There was a particularly clear half-hour during which I managed to shoot eight good two-minute .avis with more specific settings. After the usual software jiggery-pokery, I've managed to get the images from the best .avi stacked and processed reasonably well, certainly better than any that I've done before. Here are two versions of the best stack, the only difference is in the amount of sharpening. Feel free to let me know which one you prefer:

Jupiter and Io version 1 - average sharpening


Jupiter and Io version 2 - more sharpening

  Next I've got a different challenge - getting the DSLRs set up on the mount for some widefield shots of the Perseid meteors, which are on show from July 17th to August 24th, with the peak on August 12th. The possibility of getting decent pics all depends on the weather, of course.

Awesome pics

Posted by on July 13th 2009 in Astrostuff, Blog on Site, Pics

For those of us with interests in photography, vulcanology and astronomy, I've found a site that ticks all of the boxes.

Just click on the following pic to be transported there (in a digital rather than a literal sense):

© Stromboli online, photo by Dr. Marco Fulle

© Stromboli online, photo by Dr. Marco Fulle

My thanks go to Dr. Fulle for his approval of the use of this thumbnail photo on my blog.

Observatory progress – Phase 7 – The last few bits

Posted by on June 18th 2009 in Astrostuff, Making stuff, Projects

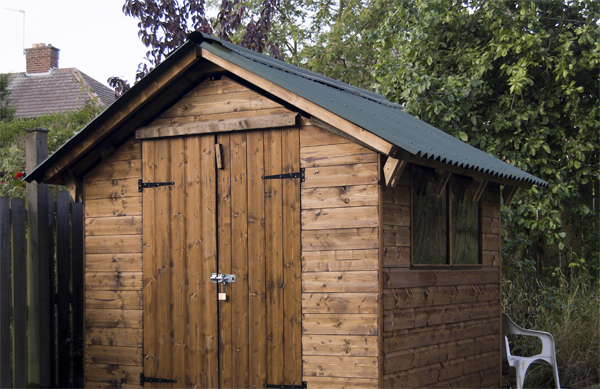
I've received a few emails from folk asking how much more needs doing to the astroshed, and indeed wondering why it doesn't fall to bits, go off the rails or just refuse to close due to misalignment. Hopefully the following pics and text will be sufficient to answer such probing questions:


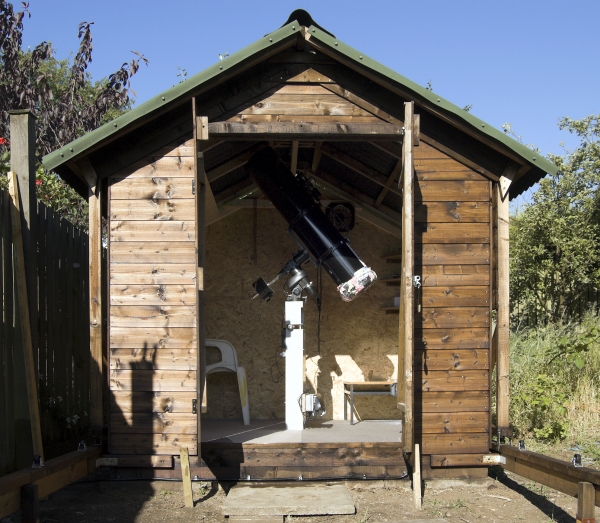
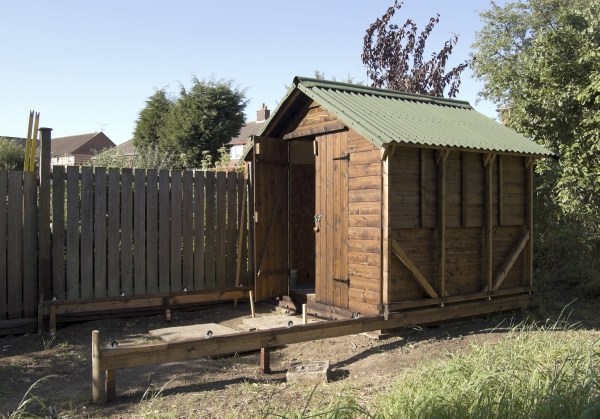
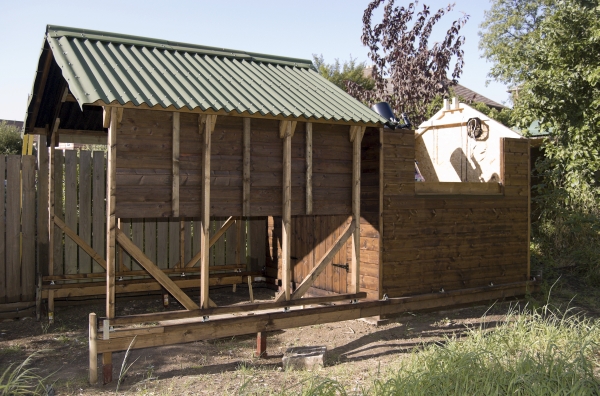
In order to allow the scope to fit inside in the "parked" position, the roof sits a good three inches
above the shed walls to give sufficient clearance.The resulting gap has been covered with a couple of
rows of feather-edge timber, fixed to the roof. Regarding the other stuff in view, a neighbour kindly
donated some carpet and I dug around in the attic to find the 1960s coffee-table.
The plastic chair is just one of many that Chris wants me to take to the tip.

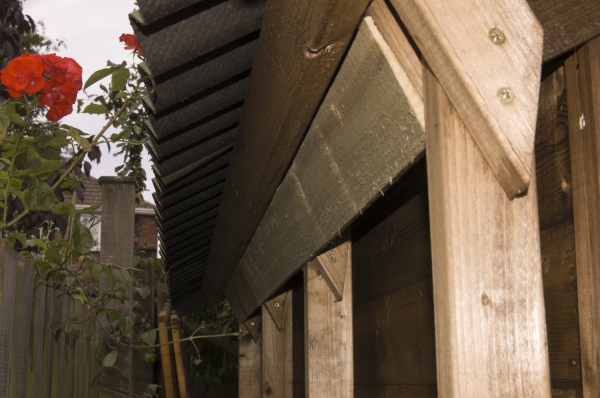
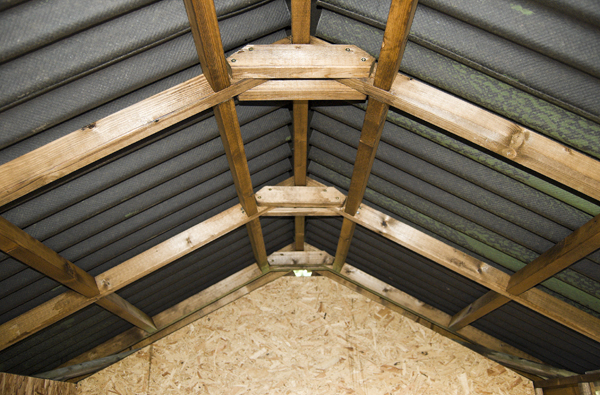
Another row of feather-edge timber creates an overlap twixt shed-walls and roof-frame on one of the long sides.
This setup is weatherproof but still allows good airflow to minimise condensation.

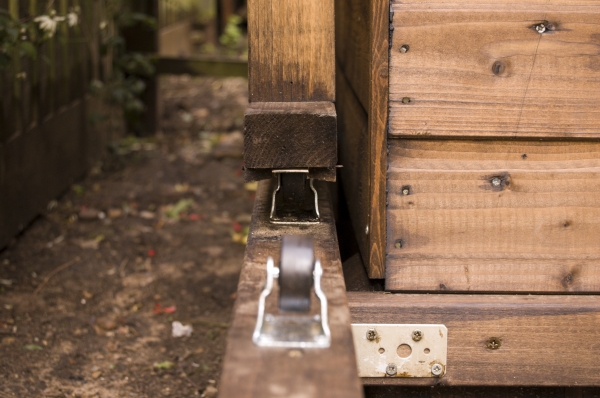
The wheels are cheap 40mm fixed castors, the channel is a strip of plastic conduit braced with some spare stripwood with chamfered ends.
The castor-wheels have sufficient sideplay to allow for a reasonable amount of flex/warp of the runner.

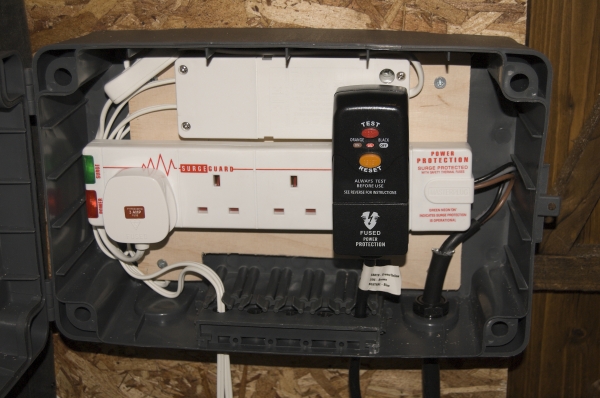
The leccy's all sorted out, with IP55 or better fittings throughout for anything mains-related,
and with power being supplied via an RCD-protected steel-armoured cable circuit...

... which means that the cheap Ikea low-voltage halogen lamps above the doors are now up and running.
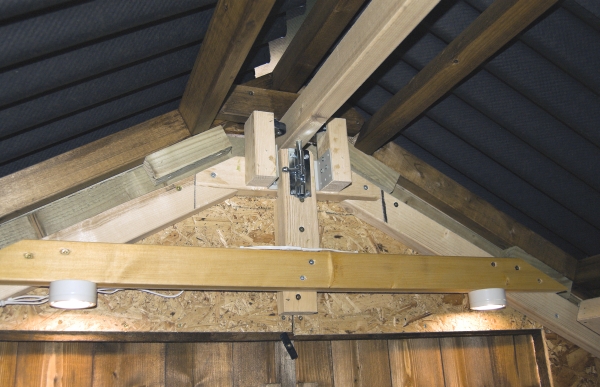
Also visible above is the guide-wheel arrangement that ensures that the guide-rail fixed beneath the ridge of the roof
is always central when the roof is closed or in motion. The barrel-bolt serves an obvious purpose.

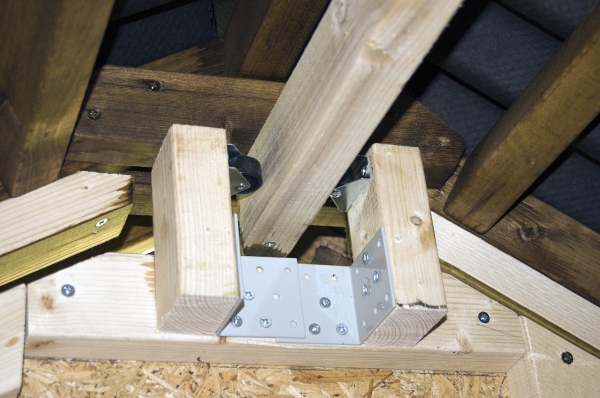
Here's a view of the guide-wheel arrangement at the other end of the shed.
The guide-rail is chamfered at the end to ensure that it always ends up between the wheels.

At the moment there isn't much wiring around the pier, but I'm sure that after a few weeks the thing will be festooned with all sorts of gadgetry.
I'm aiming to have just the one "in" cable (for power) and one "out" cable (for data (USB)).

The planned change to the window-wall has been completed - the windows have gone, to allow a better view to the south.
A "mock" panel has been fixed to the moving frame, the results are shown below:

This means that there's now no need to conform to the standard idea of having the upper section of the southern wall on a hinged flap.

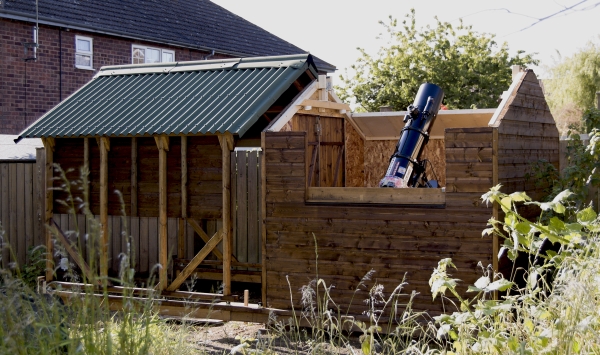
As you can see, there's plenty of "gap" to look through.
I knocked up a small removable roof-panel (visible just behind the scope) which serves several purposes -
it's a draught-reducer, it provides shade from the night-lights at the old folks' home just up the way,
and it prevents the neighbours from peering over the fence to see what's going on.

So, it's about finished. The kettle and the beer-fridge will go in when I've put up shelves for them.
The only thing still needed is a small fire-extinguisher.
That, and some clear nights so that I can get on with some observing.

Observatory progress – Phase 6 – It works!

Posted by on May 29th 2009 in Astrostuff, Making stuff, Projects

Observatory progress – Phase 6 continued

Posted by on May 29th 2009 in Astrostuff, Making stuff, Projects

Yep, it fits, purlins and all:


Tomorrow I’ll get more nails for it and fix it on properly.