Archive for the 'Shiny new kit' Category

Bob’s Honey Stove – first test

Posted by on November 13th 2008 in My reviews, Shiny new kit
Tags:

OK, I found the last of the meths. Only 18ml, but it was more than enough to get the steel glowing and to provide sufficient raging flames to boil 0.5l of water in 3 minutes. I just let it rip, not bothering with the simmering ring, so a lot of heat was lost up the side of the mug, hence I'm fairly convinced that I could have been a fair bit more fuel-efficient. Here it is, sooting-up my nice shiny mug:


So, apart from the boil-time, what other info did you get? First, I can confirm the information provided in the instruction leaflet - the panels do warp when heated, but they do go flat again after they've cooled.  Even when warped, the top grill stayed in place. Second, in the temperate climate of my kitchen, the panels cooled sufficiently to allow handling within 2 minutes. Third, the tea's going down rather well 🙂

So, do you like it? Yes, very much. It's well-made, simple to use and very versatile. There's nothing to compare it with, as there's nothing quite like it on the market at the moment. I reckon Bob's onto a winner here.

Any more thoughts? Well, I've never had any need to take a shaving-mirror into the hills, but I'm sure that one of the nice shiny side-panels would suffice. Who knows, in dire emergency you could use one as a signalling-mirror. Oh, and those rows of holes in the side panels - they're ideally-placed for fitting a hanging-kit. I'll test the stove in a different fuel-mode as soon as I can spare the time.

Bob’s Honey Stove – first mods

Posted by on November 13th 2008 in My reviews, Shiny new kit
Tags:

Right, before we start, I just want to say that these mods weren't necessary - it's just that I like to tinker with things to make them fit in with my personal intended use, and that use doesn't necessarily align with the intended modus operandi for the equipment. The unadulterated stove is clearly capable of being used with a Trangia™ burner, Bob's demonstrated that on his site, but I wanted it to work in a different manner, so I went out on a limb and did what I felt was in the best interests of what I wanted to achieve.

Anyway, I've wielded the tinsnips and the file, and now Podcast Bob’s new Honey Stove has been adjusted to suit my needs. Here's a summary of my mods:

What’s changed? I've notched the door panel and two of the five side panels as per the following pic:

Why? To allow the top grill to be removed without taking the sides apart. It can be lifted off quite easily, even when hot if you use a pan-grabber. The top grill had to be modded too.

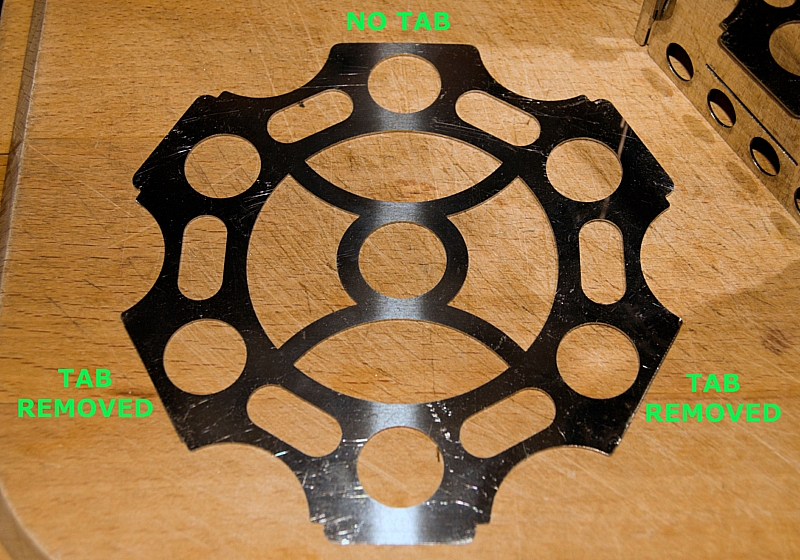
Tell me more! In order to allow the top grill to sit inside the walls, I snipped off two of the five tabs, it now looks like this:

Will it still fit into the slots as per the original design? Yes, but with only three tabs it'll only lock into three slots. But you guessed that already, didn't you?

So, does it work? Yes. Remove the top grill and it's easy to access the Trangia™ burner'. Replace the top grill and it supports the mug. The top edge of the stove is still capable of supporting pans, and I've not altered the bottom edge.

Are there any other benefits? Well, the weight's been reduced by a massive 4g. OK, it's not much, but it means that I don't have to saw the handle off my toothbrush.

What next? It's time for a brew, if I can find the meths.

Bob’s Honey Stove – first thoughts

Posted by on November 12th 2008 in My reviews, Shiny new kit
Tags:
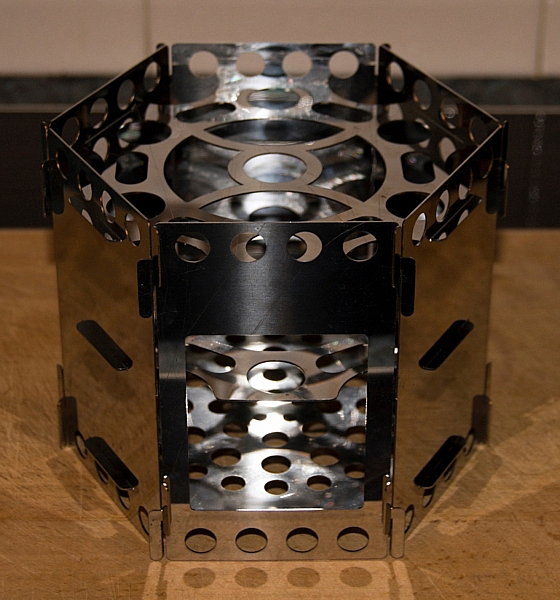
Podcast Bob's been kind enough to let a select group of folk have test-samples of his new Honey Stove, and I'm one of the lucky ones. These are my first thoughts, and the results of my first attempt at testing it. What's in the kit? A set of interlocking flat stainless-steel panels, comprising six side-panels (one of which has an aperture for accessing the interior), three grill panels (top, middle and bottom), a foil ash-tray, a cloth pouch and an A4 instruction sheet. How much does it all weigh? The stove panels add up to 356g, the ash-tray is 10g and the pouch is 44g. How much pack-space does it take up? Packed in the pouch provided, it's roughly 200mm x 140mm x 10mm. And when it's assembled? 125mm high, 125mm A/F. What's it look like? A bit like this:

Is it fiddly to assemble? Not really, I just slotted together the five standard side bits and held then in an open arc while slotting in the three grill panels. After that, I just slotted in the front panel to lock it all together. It takes 2 minutes tops, but I'd imagine that after it's been bent and dented a bit it would take a bit longer. If you can't figure it out, give it to some primary-school kids and be prepared to be embarrassed. What about stability? Very good on a flat surface, not a hint of it wanting to come apart. So, what fuels will this baby burn? It's primarily a wood-burner, but it's said to be versatile enough to work with a veritable plethora of fuels, see the product description for more details. What's the difference between the three grill panels? The bottom one has small vent-holes and is primarily for supporting sticks etc. when using it as a wood-burner, but can be used for other solid fuels. The top one is a pan/mug support, so has plenty of holes to let the heat get through. The middle one is similar to the top one, but has the central section removed to allow a Trangia™ burner to sit inside. The three grill panels are interchangeable, as they each use that same tab/slot fitting. It's possible to get away with using just one grill panel if you wanted to go all minimalist, but if that sort of thing floats yer boat I suspect that you'll already have other options in your kit-stash. This stove is aimed at versatility rather than speciality. That sixth side panel - does the aperture have to be at the bottom? No, just build the thing upside-down and you'll end up with the aperture at the top. What about cleaning it? Eh? You clean your kit? Oh dear! Seriously, a wipe with a damp rag or through some wet grass ought to suffice. Of course, you'll have let it cool first, won't you? So, what about that first test? I wanted to try it with my Trangia™ burner and Alpkit MytiMug, so I set it up like this:

So, how did it go? Not well. The front aperture's nowhere near big enough to admit the Trangia™ burner.  Bob's site has pics and a video where the burner's been put in from the top, and where the top grill is omitted. Fine for pans and large pots which would sit on the top edges of the side-panels, but a mug needs a support. I suppose the mug could be supported by two tent-pegs passed through some of the holes along the top edge, but I'm not in the habit of carrying extra pegs as part of a stove kit. The way around it might be to build the stove around the burner, but that's a faff which throws up more hard choices - sealing-cap off and risk spilling the meths, or sealing-cap on and be unable to reach in to take it off. Either way, if you want to use the Trangia™ simmer-ring, you'd be hard-pressed to access it through the aperture and you'd be at risk of getting blistered fingers.

What next? I was going to try it as a wood-burner next, but I want to get the Trangia™ issues sorted first.  Looks like my chosen test combi is a no-no at the moment. I'll post again when there's progress. Now, who's 'alf-inched me tinsnips?

More NeoAir info

Posted by on October 8th 2008 in In the News, Shiny new kit

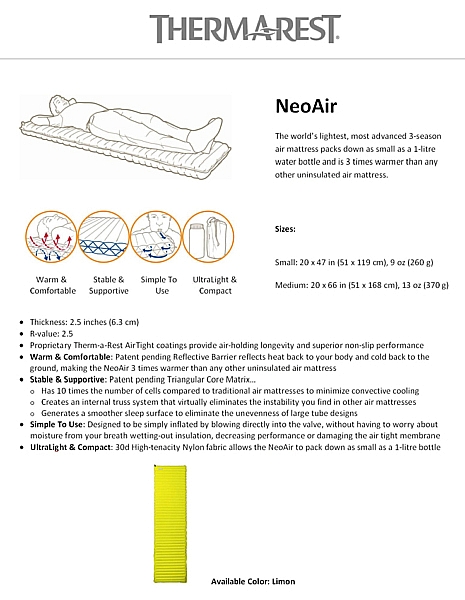
Since the previous post I've been in contact with Maurice Gowen of Cascade Designs regarding the NeoAir. Maurice kindly resolved the issue regarding the labelling of the packaged mat that we found and photographed at the Outdoor Trade Show... it is indeed a Regular (20" x 72") mat. If it can be rolled down to that size after being used, I'll be even more impressed. Maybe we'll find out soon - Maurice has been generous enough to put me on the list for testing this product prior to its commercial release on April 1st 2009. He also granted me permission to post the following tech-spec document.  Click it to see a clearer, larger version.

Therm-a-Rest NeoAir technical information (posted with permission of Maurice Gowen, Cascade Designs)

Outdoor Trade Show 2008

Click on any of the pics to open up a bigger version in a lightbox thingy, you'll need to wait until the page has finished loading.

Darren "whitespider1066.com" Christie called me up and asked me if I wanted to attend the Stoneleigh Outdoor Trade Show 2008 with him. Well, it seemed like a good idea at the time, so we arranged to meet there on Tuesday 30th September.

I'll spare you the ordeal of a full rundown of events, I won't even give you lists of kit-specs - you can get all that stuff at Darren's blog. Instead, I'll give you the edited highlights:

The first place of any note was the Inov8 stand, where we were treated to a lengthy demo of some of their lightweight hydration systems and Race Elite/Race Pro packs, and some other stuff. Nice kit, some of which is in "His 'n Hers" designs, just like in the following pic:


His 'n Hers pack designs - Inov8

I was impressed with the overall design of these packs, but I've still got reservations about that central zip and the way that the compression system pulls on it - I was assured that the zip's been tested and not found wanting, but if it failed, I can't see how the contents of the pack would stay inside. Oh, and I can't see the point of having a "waterproof" zip on a pack without sealed/taped seams. Maybe I've missed something there, eh?

Next up was the ARK display, where we concentrated on the OMM packs. I liked their Leanweight Link modular clip-on system, which means that you can "build" a carrying system from any bits of their range, piggybacking smaller packs onto bigger ones, and/or strapping other bits underneath. And what a great colour-scheme! This was my first encounter with the much-acclaimed Trio 4 litre chest-pouch, and it looked like a cert for a future purchase until the claim of "it'll fit onto any other pack" was blown out of the water when I offered up my Alpkit Gourdon... which has no "D"-rings on the straps. Anyway, here's a shot of a pack and belt-bag linked together in perfect harmony:
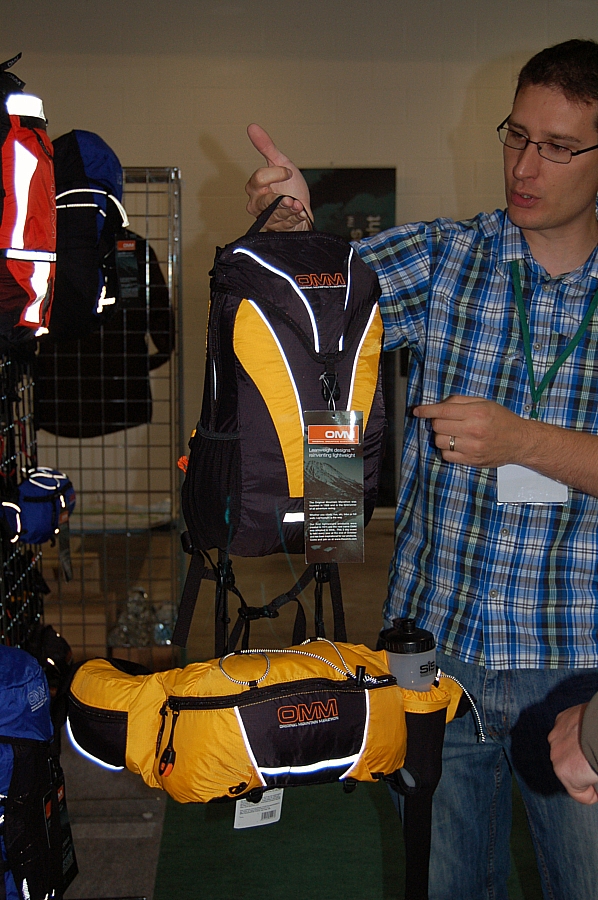
OMM Last Drop Pack and Ultra Waist Pouch

A bit later we arrived at the Terra Nova display and had a chat about their 1g Titanium Pegs - I have to say that I wouldn't be confident in using them - any thinner and they'd be cutting their way through the ground like cheesewires in the slightest breeze. I've no doubt that there's a use for them, but I don't have that use. I might be cajoled into trying them with my hooped bivi, but that would be the limit of my adventure, as I like my shelter to be secure without having to rely on my bodyweight to hold it down in a hoolie. Just for the record, the pegs are £15 for a six-pack.

Their lightweight Laser packs looked OK, with that waspy colour-scheme again, but we're back to full-length waterproof load-bearing zips again. They're not for me.
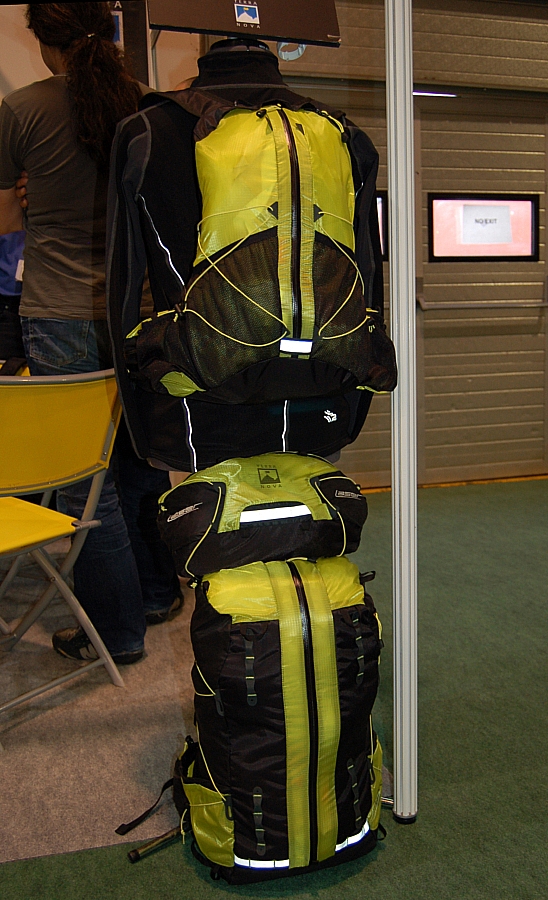
Lightweight Laser packs

Further on, Darren was keen to dig for info about Hi-Tec's use of ion-mask technology on their footwear, I was content to keep quiet and take some pics:
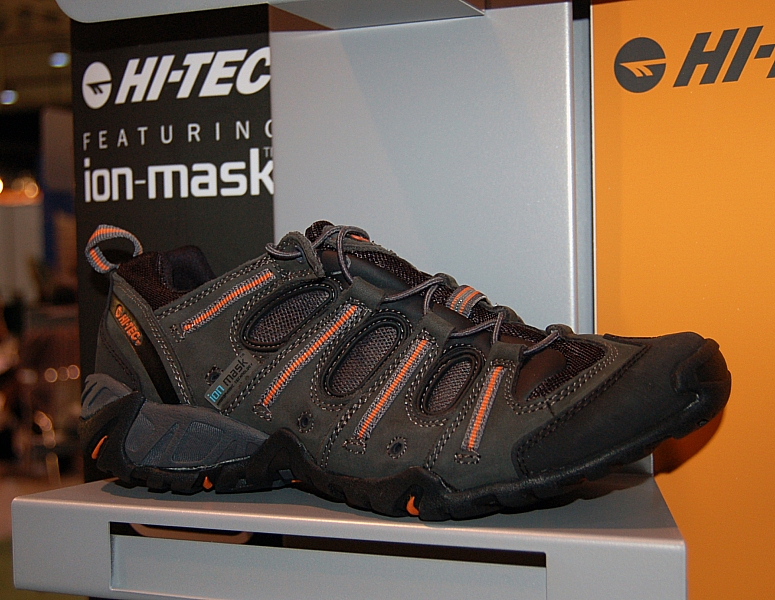
Hi-Tec ion-mask footwear - upper
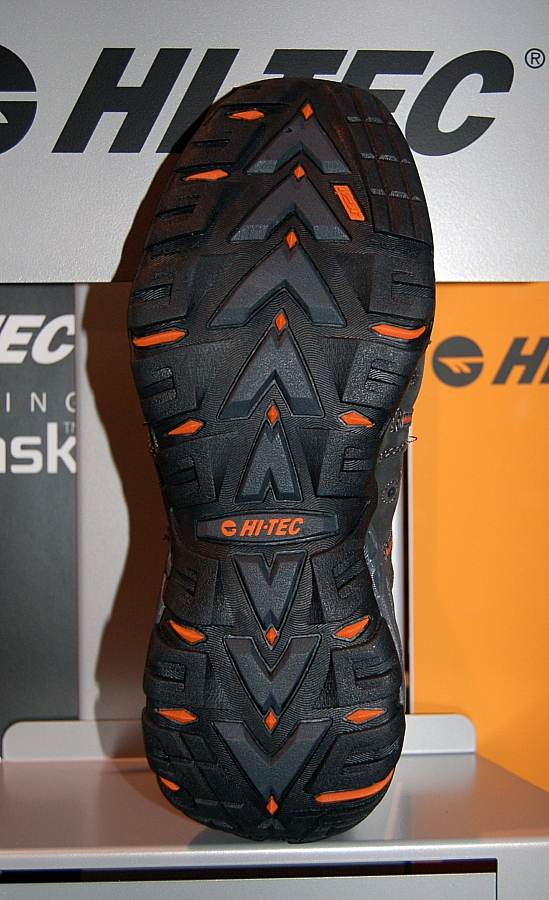
Hi-Tec ion-mask footwear - tread

At the Big Agnes stand we had a chat about gear-testing bloggers. A certain Mr. Macfarlane was mentioned by the staff. Seems he has the odd bit of kit from them, now and again.

Anyway, out attention was drawn away from the tentage to the Clearview sleeping-mat and the associated Cyclone SL Chair kit. I was quite taken with that mat/seat combo, it's got a certain simplicity and cleanness to it. For a short time, it was at the top of my list of must-haves.
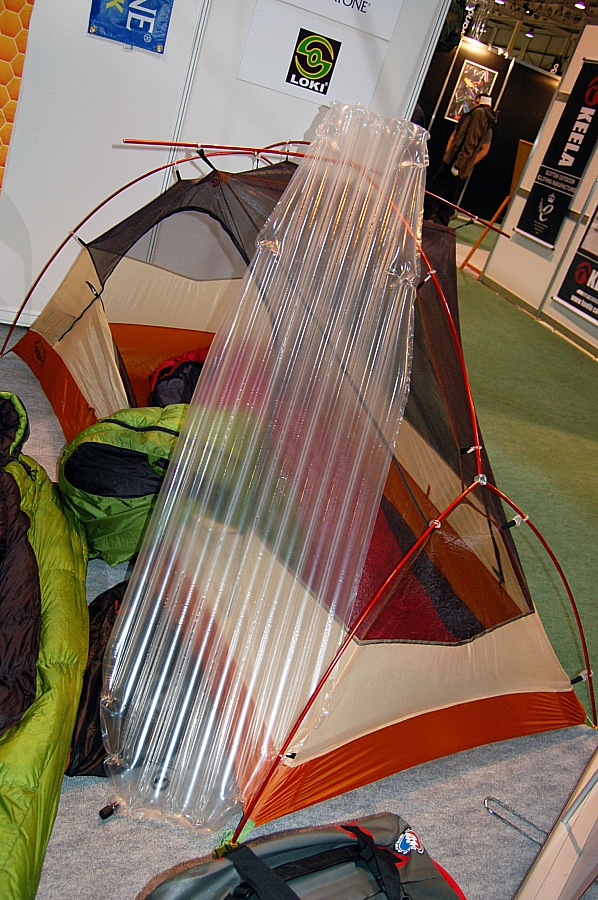
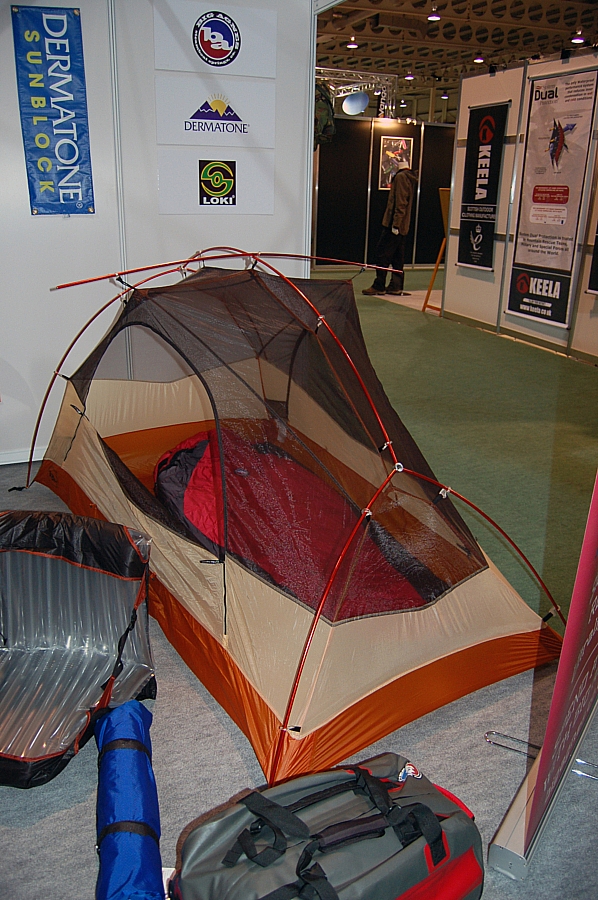
Big Agnes kit

We spent a fair amount of time at the Rosker stand, being treated to a set of first-class demos of the latest Primus stoves. First up was the Primus Eta Packlite, more of a multi-person stove system, and there's a lot of bits packed away in there. A neat bit of kit.
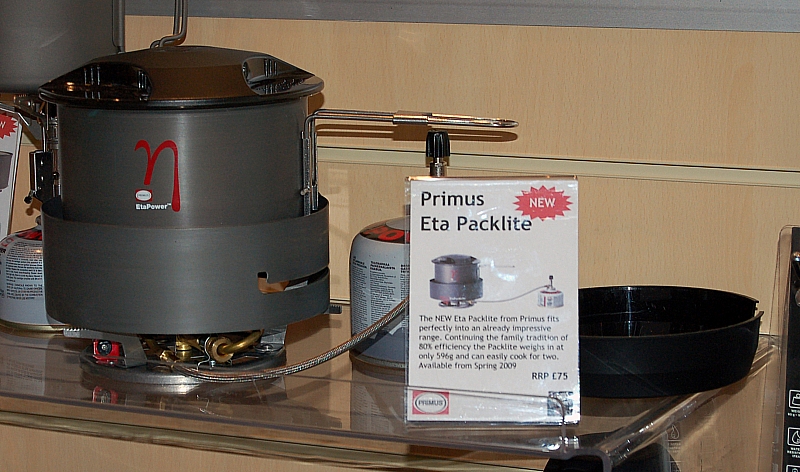
Primus Eta Packlite

Second was the Ti-Lite, a lightweight pot/burner/canister combi:

Primus Ti-Lite

and finally there was the EtaExpress. We were assured that it wasn't a competitor for the Jetboil PCS, but it was hard to see it in any other way - the similarities outweighed the differences:

Primus EtaExpress

The conversation strayed to other items such as in-line water-filters for hydration systems, but my attention was dragged back on-topic by the kind and timely offer of a freebie pack of Reiter Vegetable Risotto which was gratefully accepted on behalf of SWMBO.

Then it happened. I was idly perusing the gear on the First Ascent display when my gaze was drawn to the sleeping mats, and to the Therm-a-Rest NeoAir in particular. It just looked right - a mat with transverse cells so there's no fighting to keep shoulderblades from slipping into chasms between long cells such as those on the Insul-Mat Max-Thermo, which was the most comfy mat I'd ever tried until then.

It had to be tried, and soon was. After having a good lie down on it, I really didn't want to get up. Now I'm in love all over again!
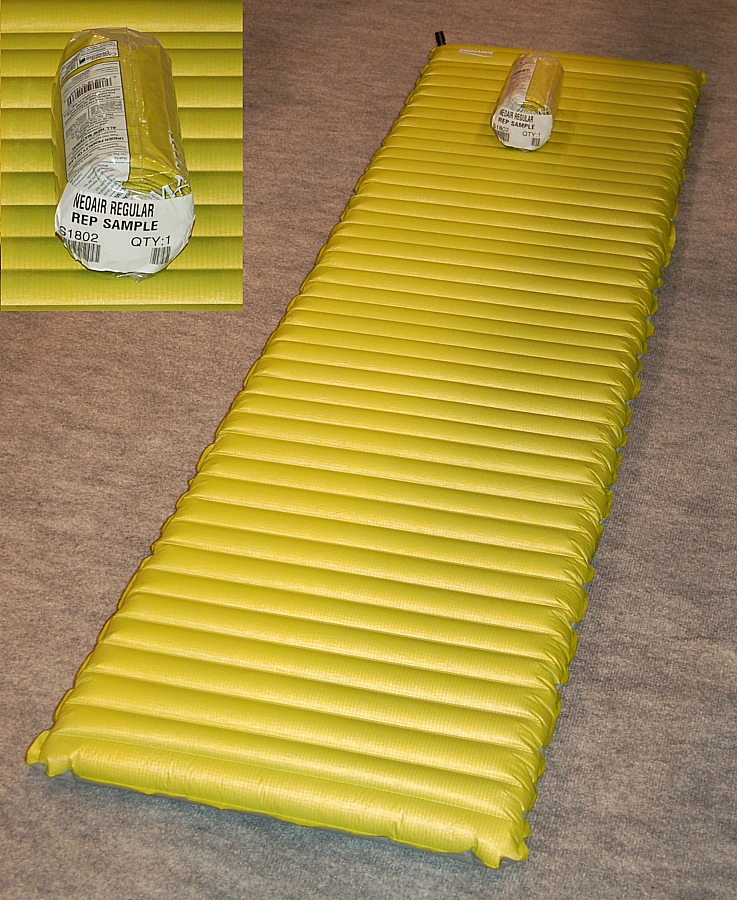
Therm-a-Rest NeoAir mats

For the record, the packaged one in the inset was labelled up as 20" x 48" Regular, which seems to be a labelling error. The deployed one in the main pic is 20" x 72". You can't tell from the pics, but the underside is slip-resistant, so there'll be no nocturnal migration downslope when used in anger.

One surprise was the encounter with HJ Hall. This company is located in my home town, being one of the few hosiery businesses still standing after the demise of the local industry. I took a good look at their new range of socks, especially the lined heavyweight Technical 4 Dual Skin and I'm tempted to ask them for some test-samples to see how they stand comparison to the other socks that I use (mainly Thor-Los, some others). They retail at under a tenner, which is much less than the others in my sock-stash, so I reckon it's worth keeping an eye on these.

Now I wasn't planning to visit the ENGO stand, but their product was intriguing. Blister prevention patches. Fitted to the boot, not the foot. If these work, the outlay on Compeed/Spenco/Zinc Oxide tape can be reduced. We were given some samples to test, all I have to decide now is which boots to test them in - I suspect that the Scarpa SLs will be at the top of the list.

The ENGO stand
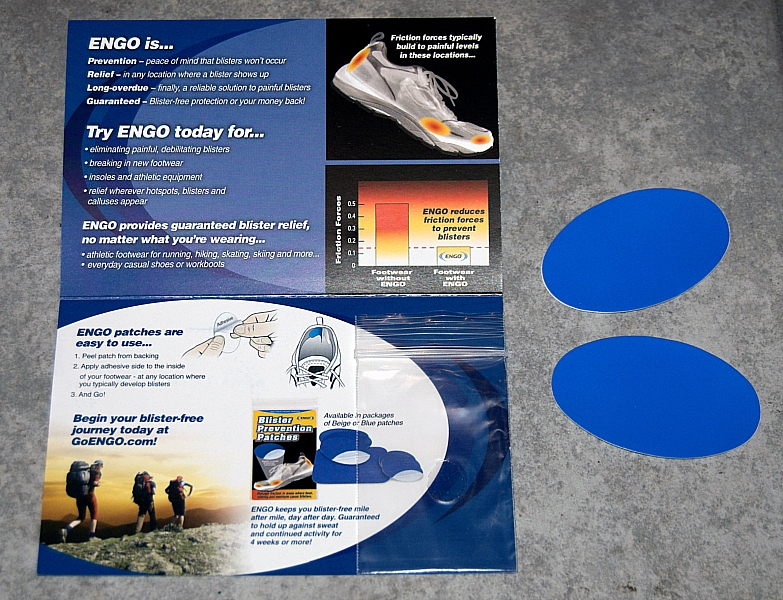
ENGO patches

The Anatom stand was demonstrating Pacerpoles. Now I'm no lover of standard walking poles, being firmly rooted in the biped camp, but I must admit that these things have piqued my interest. The first thing of note is the camera attachment widget that pushes into the accessory hole (I've an interest in all sorts of camera attachments - yes, it's sad, but it's not as if I've an all-consuming stove-fetish like another blogger that I could mention). Then came the coup de grâce - there's another attachment that links two poles to form an A-frame, which fits to a bespoke(?) tarp, which is a neat idea, something designed for the job, rather than using odd poles and whatever tarp is to hand.

Carbon Pacerpoles with camera attachment

I'm nearly converted. My bank-manager won't like it, but at least I can use the pointy ends of the poles to fend him off.

While we were at the Anatom stand, Darren allowed himself to be talked into having some Superfeet footbeds fitted. Now I'm not saying that he really needed them, but this is what they were replacing:
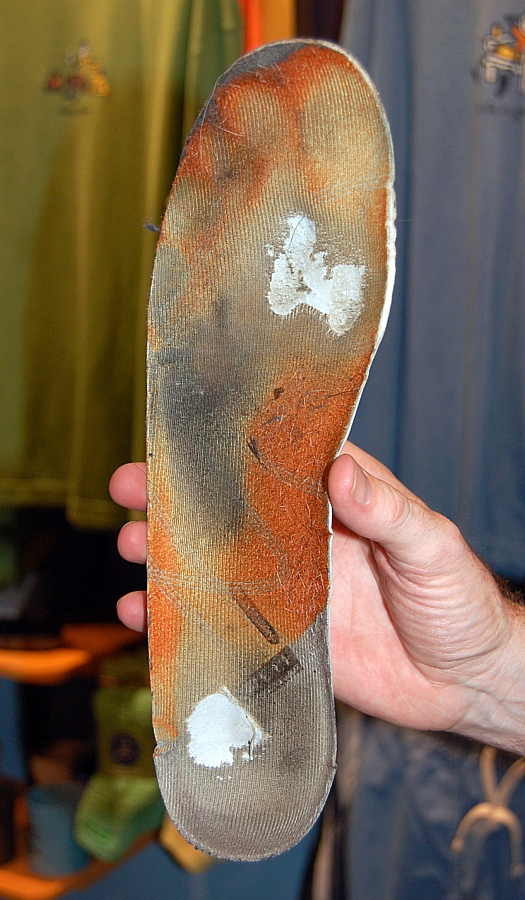
Not-so-Superfeet footbed

Just before leaving we went to see the Garmin display on the Dalesman stand. I had a very informative chat about their new range of do-it-all GPS units, and I got to play around with the Oregon 300 - very nice indeed. I left with a press-pack in a shoulder-bag, and an offer to contact them about acquiring a unit to test. It wasn't until I got home that I opened the press-pack to find that most of the promo material was on a 1gig USB datastick - how cool is that?

This was my first time at the OTS, so I've got little to compare it against. For gear-heads it's better than the OS Outdoor Show, there being more "cutting-edge" stuff to look at, and more time to discuss developments and ideas. Maybe they'll let me in again next year!

My thanks go to Darren for the invitation and the good company. It was a good day out.

Cheers, Darren.

Extended coverage

Posted by on September 16th 2008 in Shiny new kit

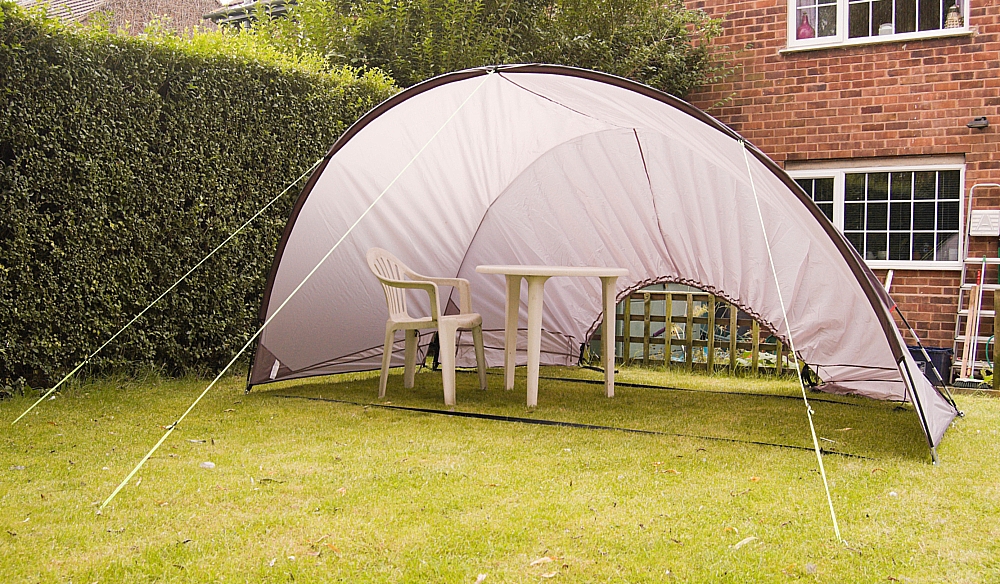
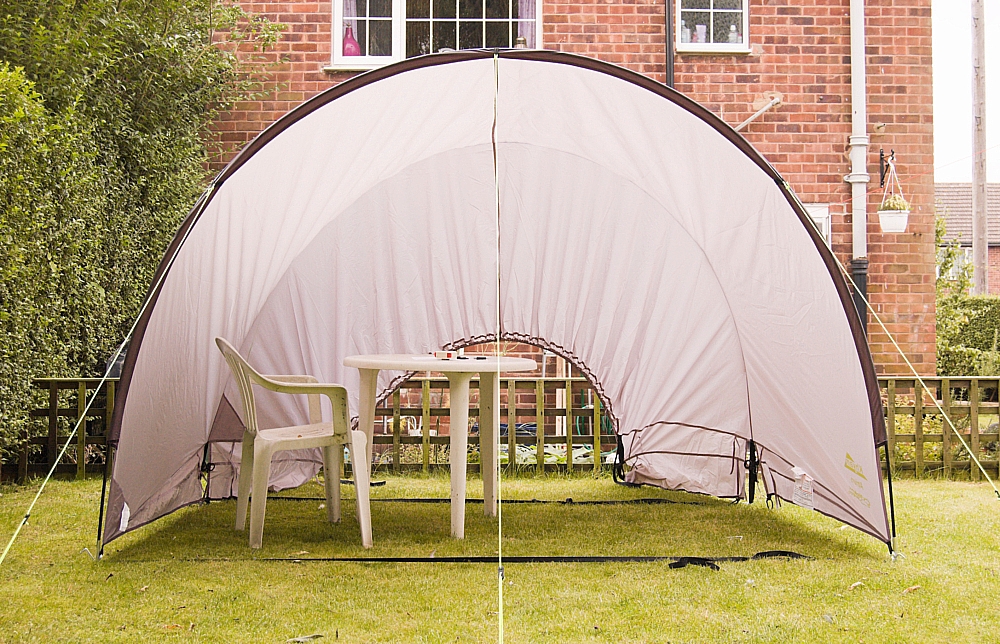
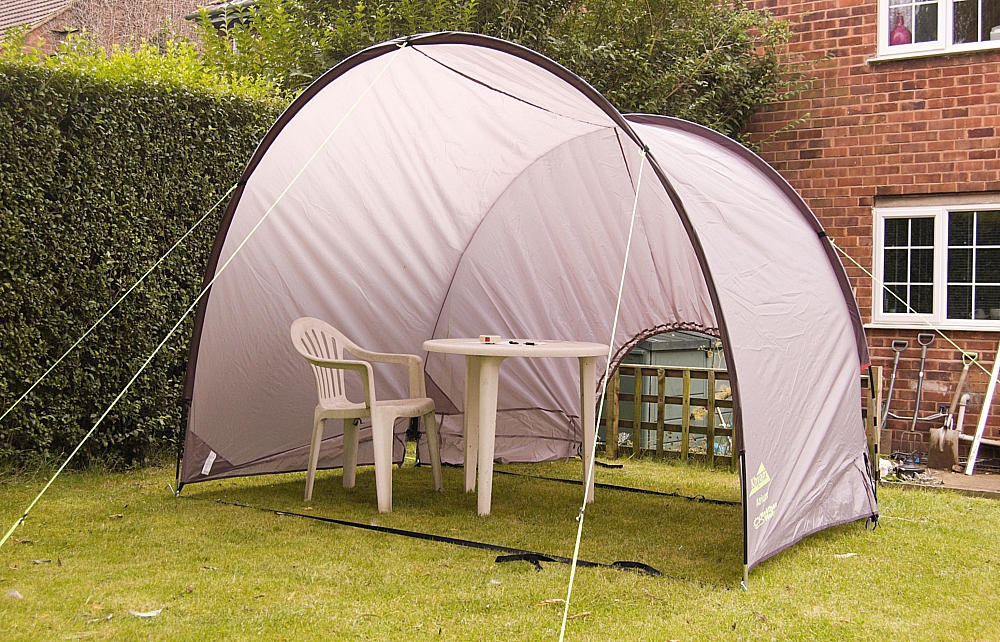
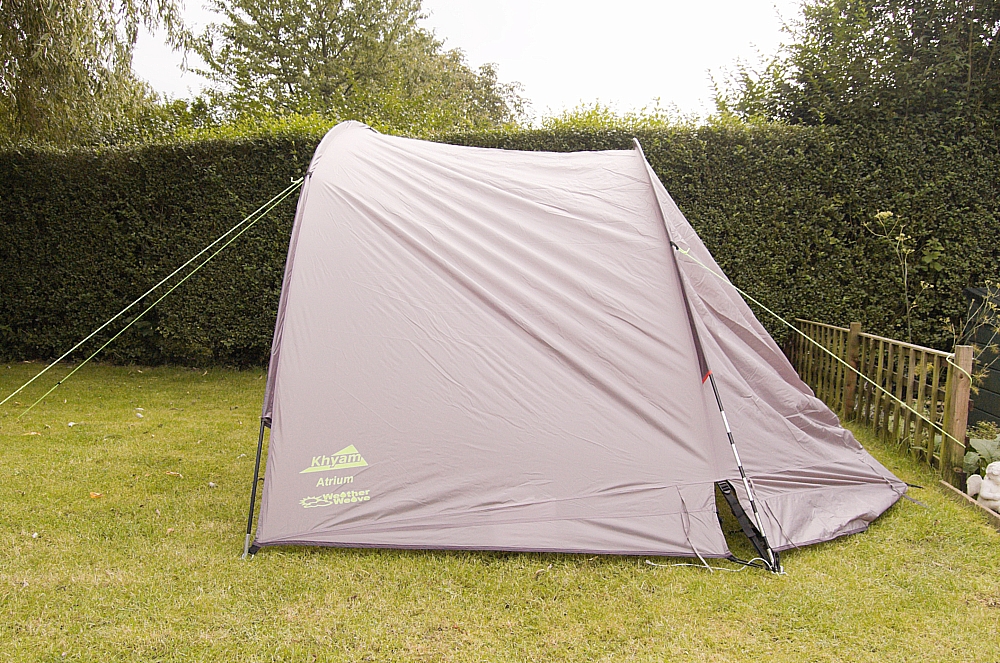
Spurred on by our efforts to use a tarp to extend the comfy space around our tents while site-camping on holiday, and frustrated by the scarcity of Exped Arc Tarps on the market, yesterday saw the acquisition of a new bit of kit - a Khyam Atrium, which is in the current Yeomans sale at £20 below RRP.

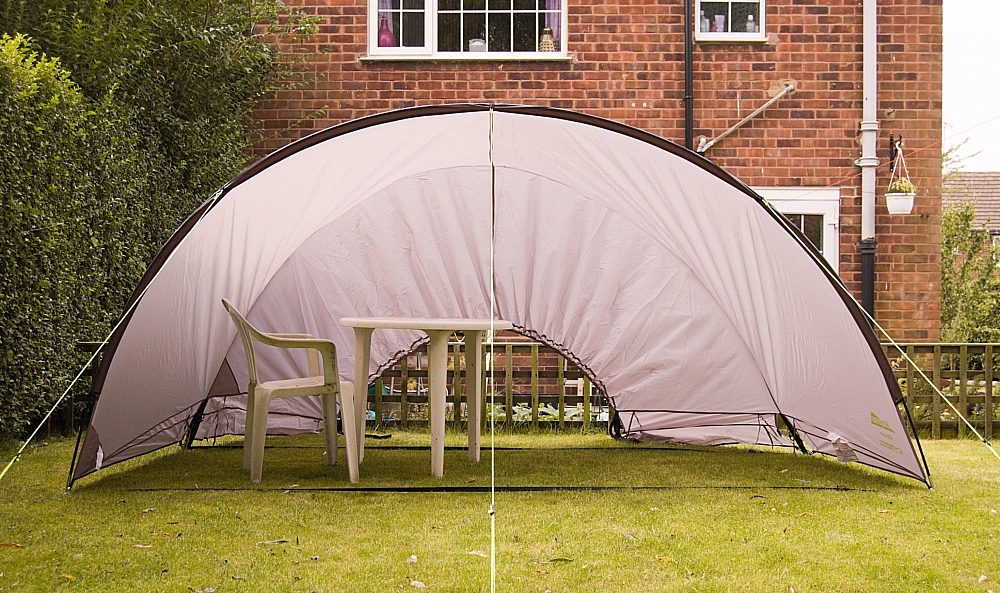
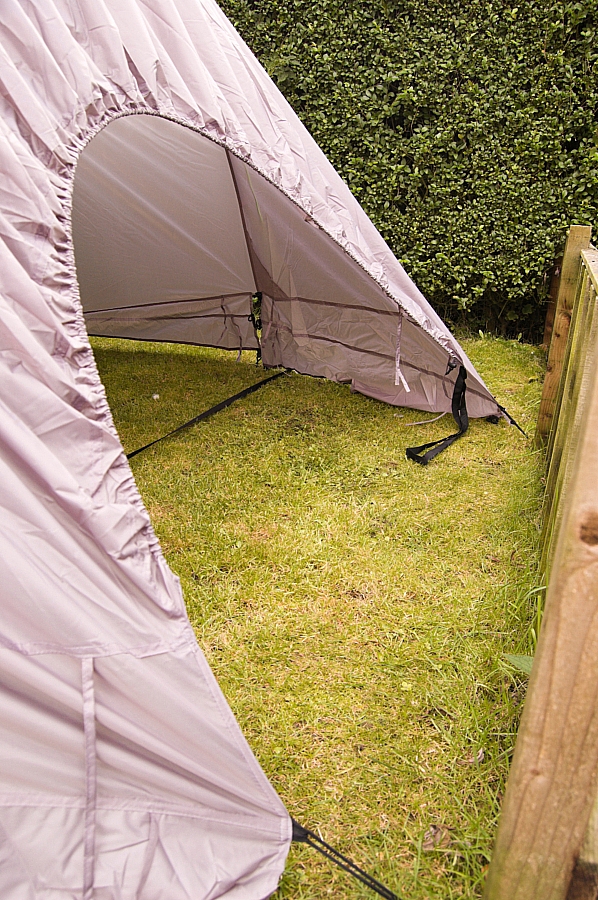
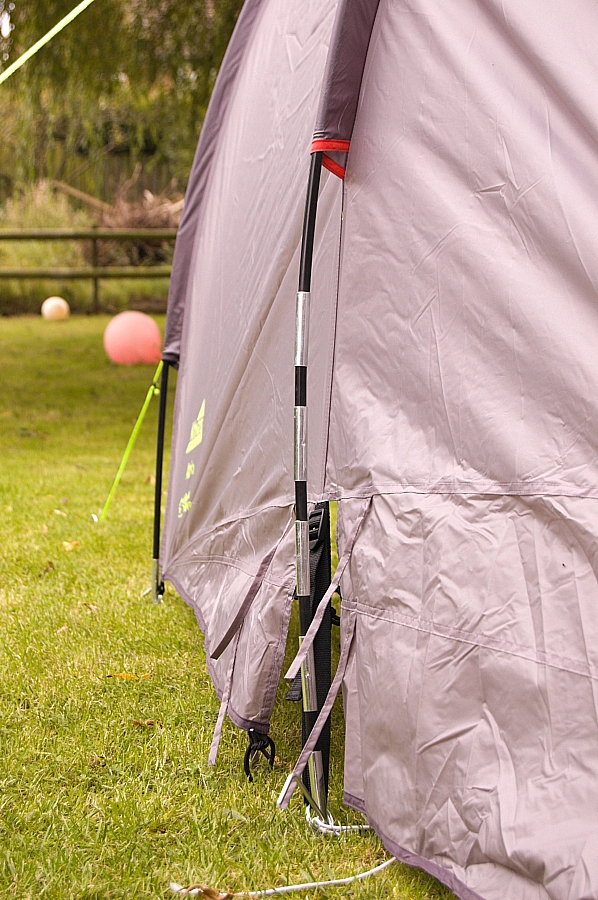
It's a tent extension/porch/canopy affair with webbing straps and an elasticated and toggled drawcord to allow a neat and secure fit over the openings of most small/medium tents, and the poles are adjusted for height/width by means of a tension-band system between the pole-ends. If that's not enough versatility, the "middle" pole is adjustable in length so that you can get the height/width just as you want it. There are plenty of guying and pegging options, and, as you can see, there's plenty of room under it:


2 pics above: width = 3.5m, height = 1.5m


2 pics above: width = 2.8m, height = 1.8m


Above: pole-end spacing = 1.5m


Above: elasticated and toggled drawcord etc..


Above: length-adjustable pole.


Specs from the Khyam website:

Poles: Fibreglass - 9.5mm

Flysheet: Polyester 185T - 68D / 5000mm - Flame-Retardant - Taped seams

Height: Adjustable

Weight: 3.9kg

Dimensions: As the Atrium is fully adjustable it is not possible to list or show all dimensions.

Packed size: 64x12x12cms

Colour Options: Castle Rock / Paloma