Wednesday 20th February, 2008

Clouds across the Moon :- (

Posted by at 9:49 pm in Astrostuff.

It's not looking good for the planned eclipse-observing session, we've 8/8 cloud cover here at the moment (as predicted).

No matter, I'll err on the side of optimism and get set up and ready anyway, just in case there are any viewing opportunities.

Monday 18th February, 2008

Big country = big stamps

Posted by at 11:17 am in Just for fun, LMAO!.

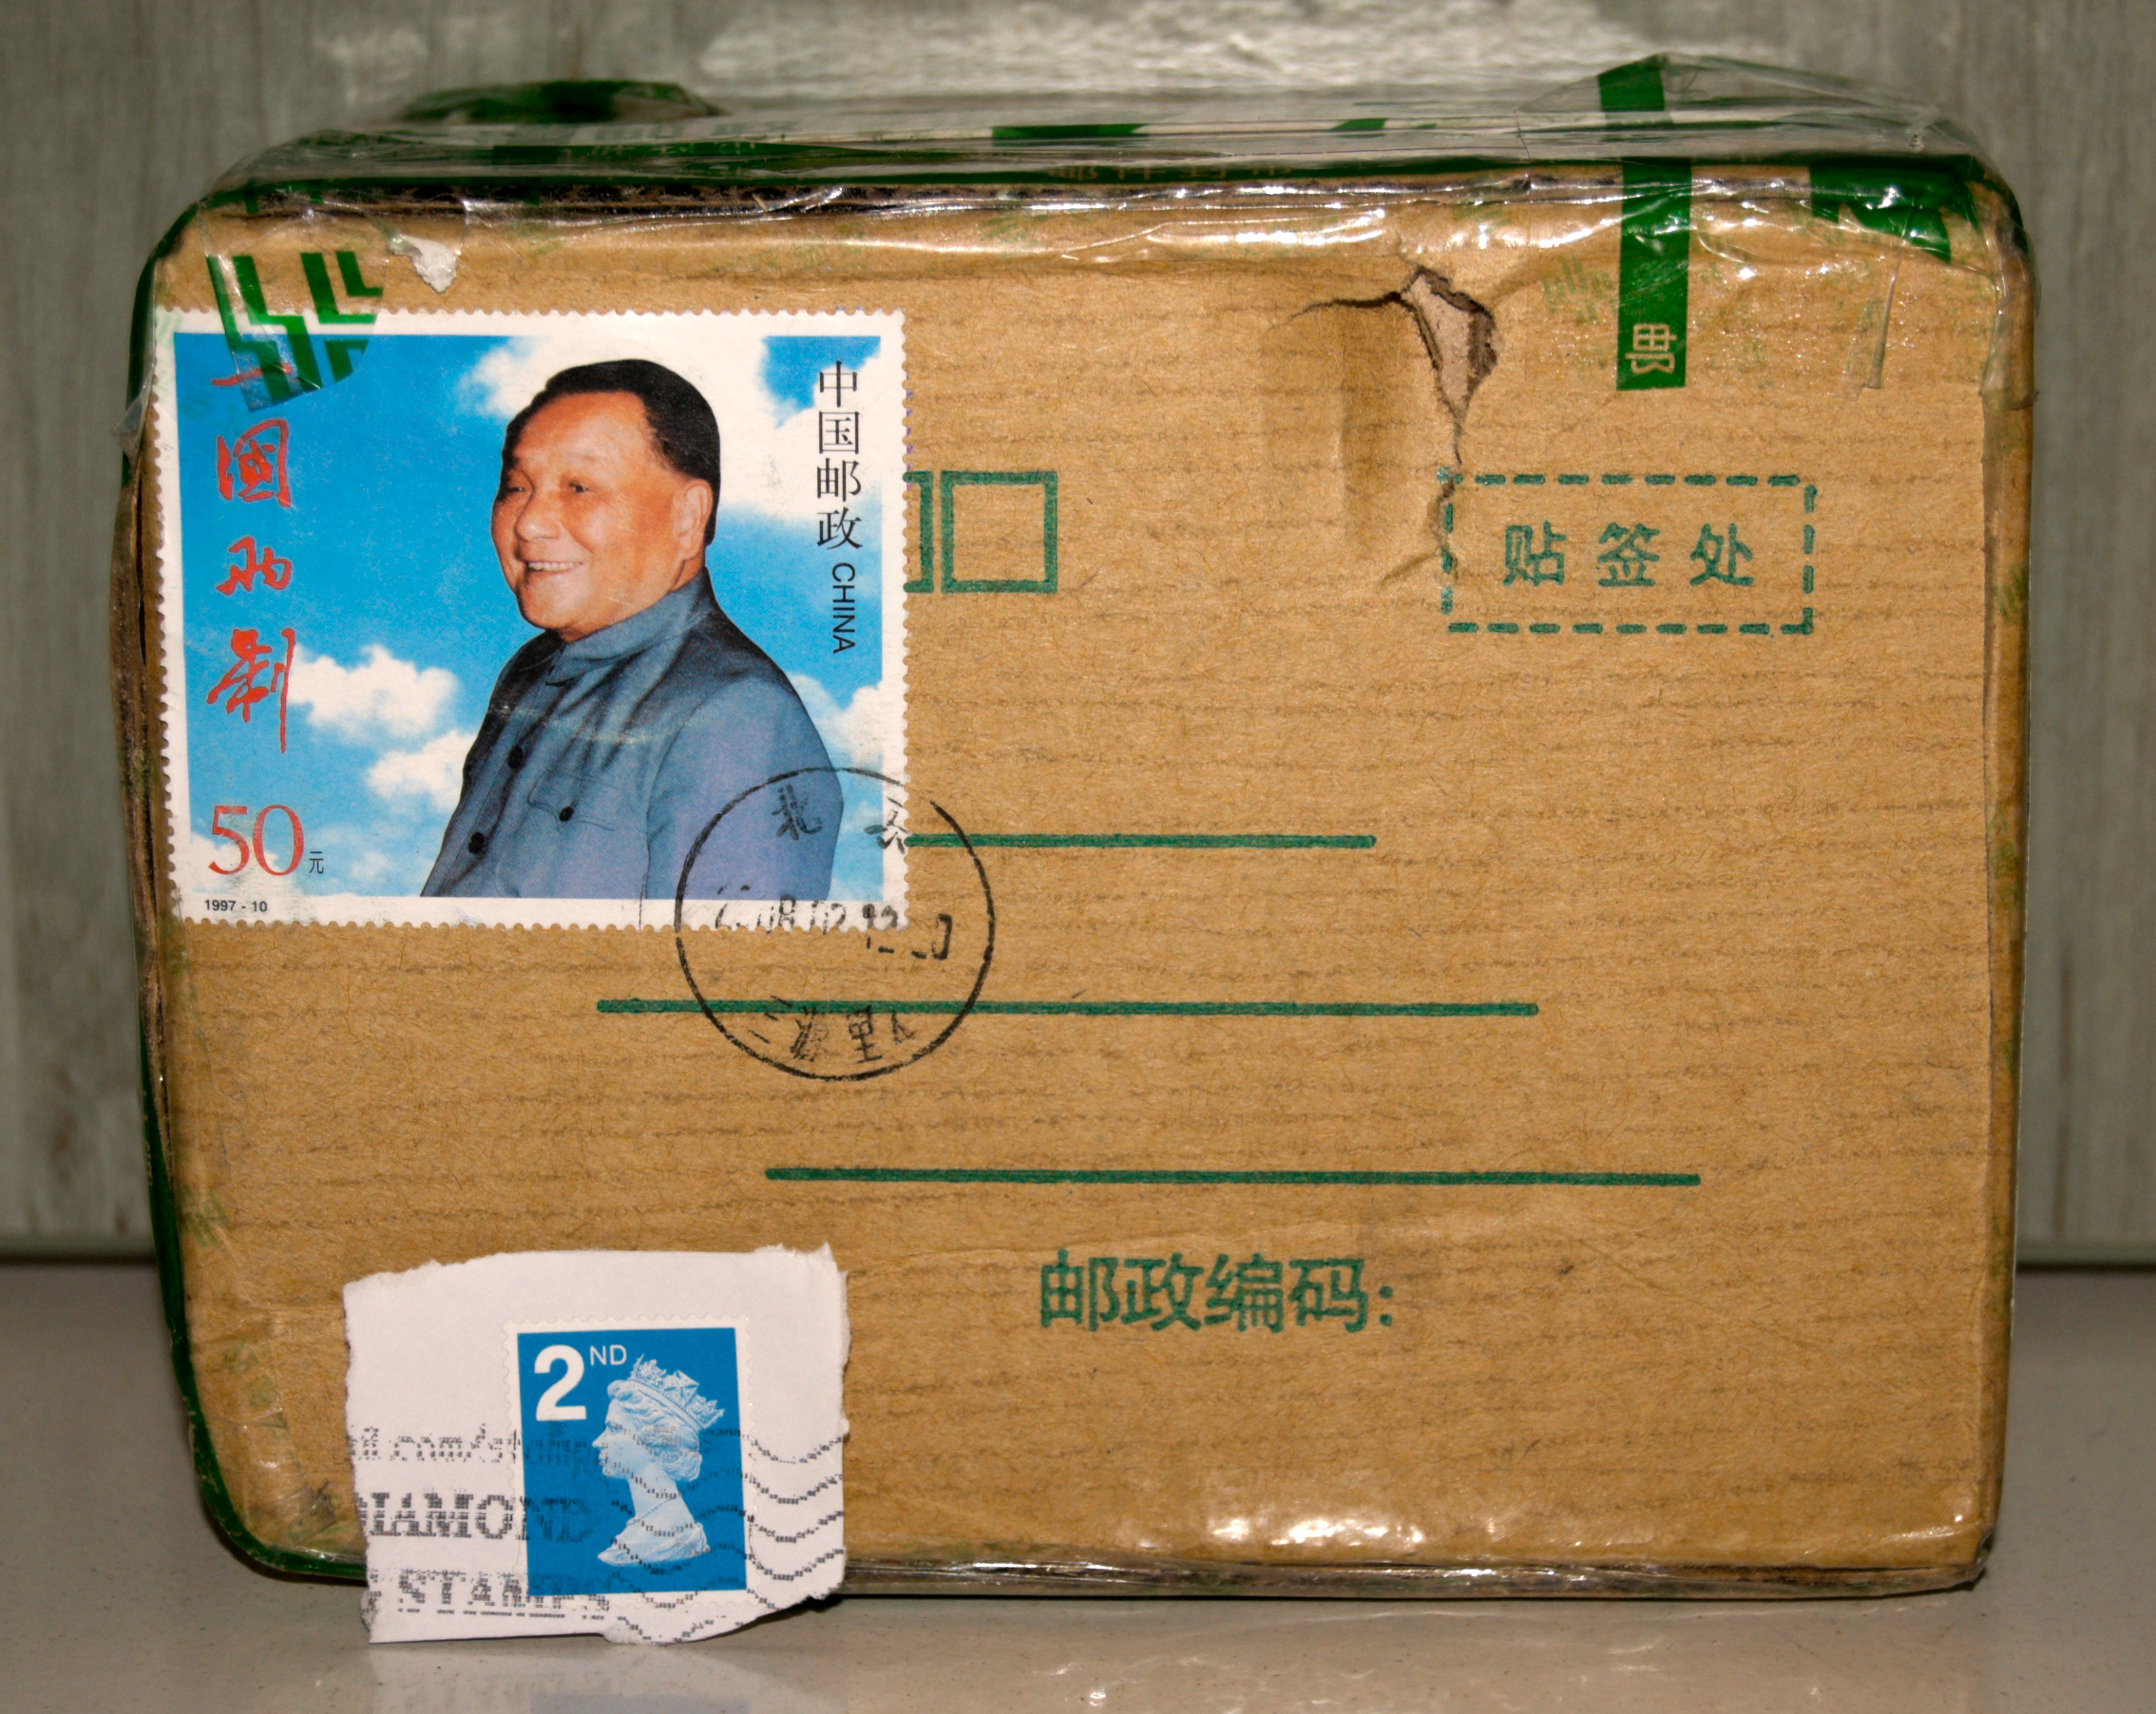
I just took delivery of a stamp from China.

On further inspection, I noticed that there was a parcel attached to it!

Saturday 16th February, 2008

Observing Report 15th-16th February 2008 (More of the Moon)

Posted by at 2:17 pm in Astrostuff, Observing Reports.
Tags: ,

Last night I was back out on the yard trying out different astrophotographic methods and a few home-made gadgets for making this scoping business a little easier.

Using the Baader zoom eyepiece for the 3-star alignment routine makes the process a doddle. Centre a calibration star in the finderscope and it's usually visible in the field of view of the Baader when it's set to 24mm. Re-centre it in the eyepiece then zoom in to 8mm and recentre it again. Reset the finderscope again, so the star's centred in both fields of view. Much easier than having to change eyepieces again and again...

After doing the alignment routine I told the handset to slew the scope around to the Moon and then I set the tracking to Lunar Mode. After taking a few shots afocally (D50 with 18-55 lens @ 55mm through 20mm eyepiece) I decided to try some prime-focus shots (D50 body T-mounted directly to the scope) and rattled off a series of shots at various speeds after getting a fairly good focus using the Hartmann Mask. I reduced the diffraction-spikes by fitting a shroud around the open end of the scope to prevent ambient light from hitting the vanes that support the secondary mirror. The shroud, like the Hartmann Mask, is a simple home-made jobbie made out of a bit of closed-cell foam sleeping-mat.

Mars was out of sight behind the house, so next up was Saturn. Again, I got great views through the zoom, the Cassini Division in the rings was well-defined and all five of the main moons stood out well despite the glare of their mother planet. I couldn't take any pics because the camera had iced up and needed taking inside to recover.

I had a look at a few DSOs before packing away and getting the kit (and myself) inside to defrost.

Anyway, here's the best image of the night, click it to go large:

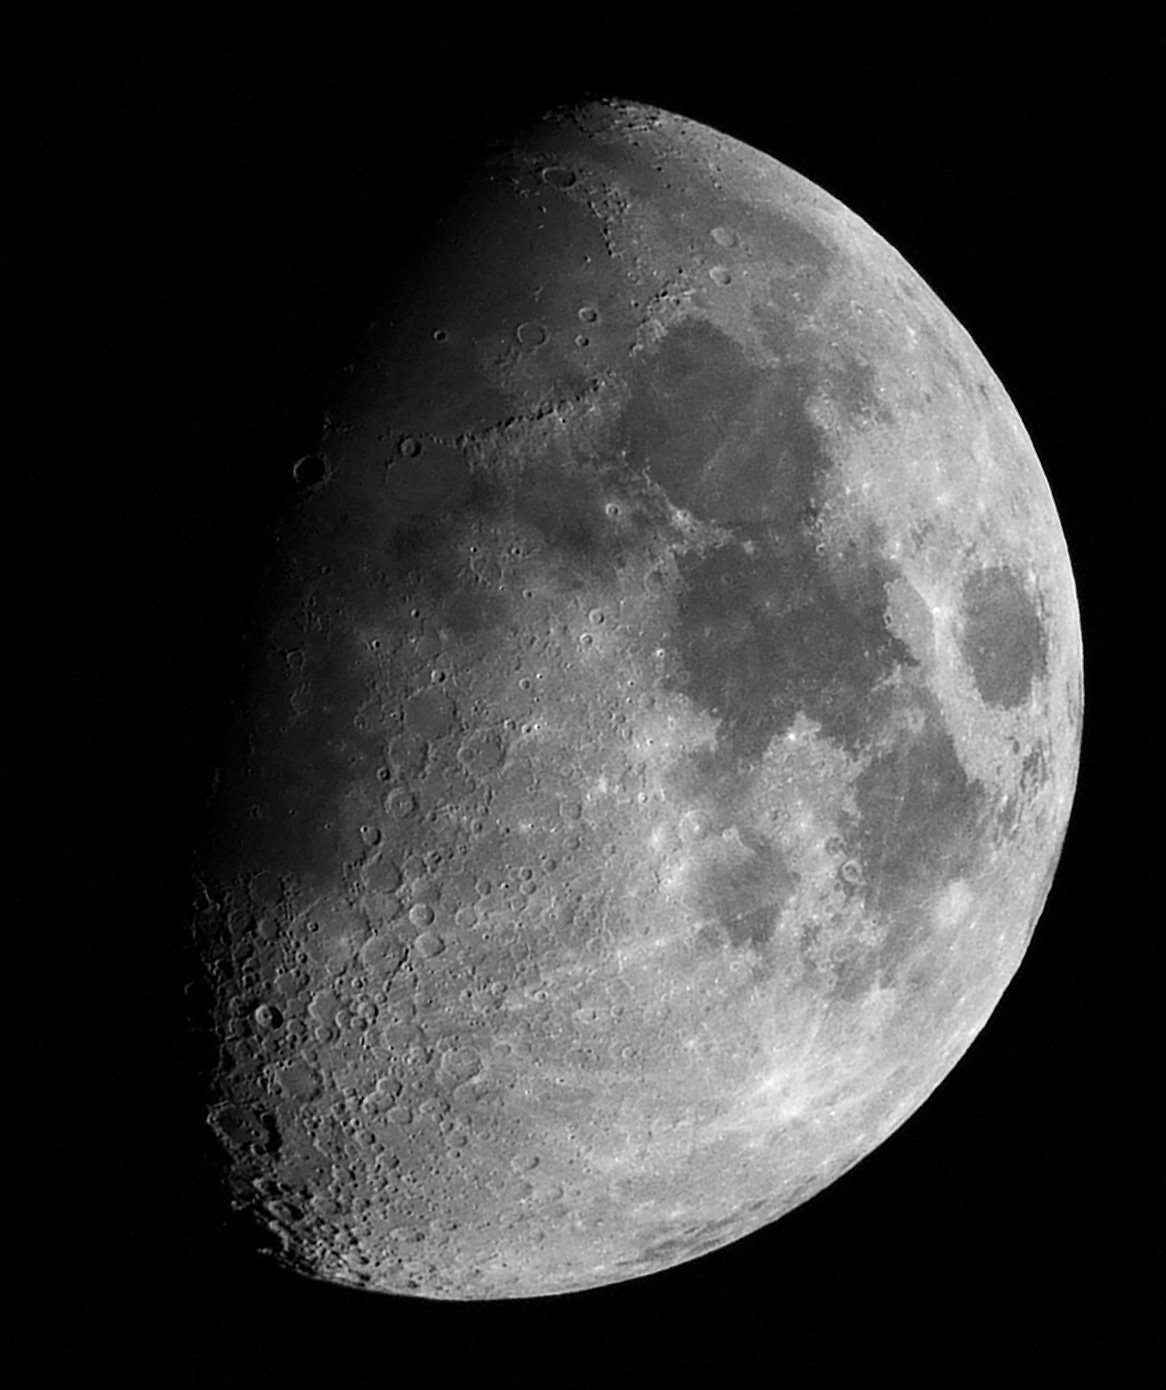
D50 on C8-N at prime-focus, 12 frames at 1/1000s, ISO 200, stacked in DSS, not Photoshopped (yet).

Next, I need to work on the focusing for imaging stars using the prime-focus setup. Maybe when this cold-snap's over.

Monday 11th February, 2008

Observing Report 8th-9th February 2008 (First Saturns)

Posted by at 12:41 pm in Astrostuff, Observing Reports.
Tags:
After re-collimating the primary mirror (which, I found, was loose in the mounting cell) I got the scope out again to take advantage of the exceptionally clear skies, and to try out the new Baader 8-24mm zoom eyepiece and various combinations of camera mountings. After doing the polar-alignment and 3-star alignment routines, I told the handset to slew the scope around to Mars for a quick look before it went out of sight behind the house. With the eyepiece set to 8mm, I could just about make out some faint surface detail, but I couldn't capture it on camera as there was too much ambient light from the surrounding houses, causing excessive diffraction-spiking. Next was Saturn. I got great views through the zoom, the Cassini Division in the rings was well-defined and all five of the main moons (Enceladus, Dione, Titan, Tethys and Rhea) were visible. I set up the D50 and took a series of afocal shots through the 20mm eyepiece at various camera settings, trying to find a good compromise between exposure time and aperture. Here's a montage of the nine best pre-processing images:  

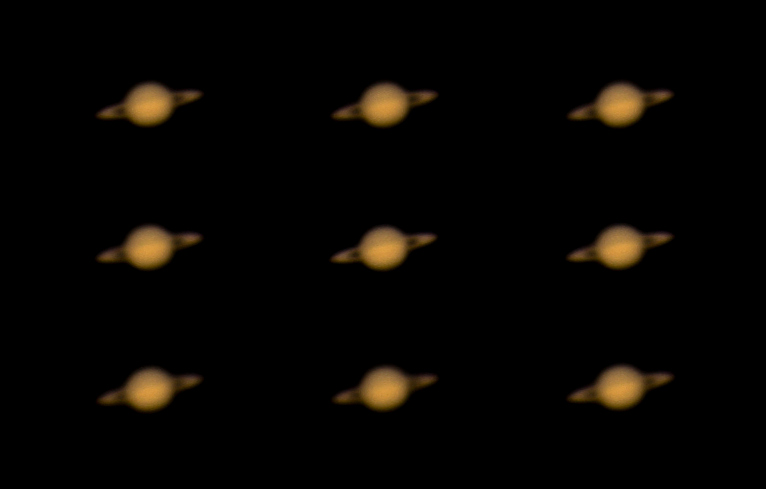
D50 with 70-300 lens @ 70mm, f/4.0, 1s, ISO 200, through 20mm ep in C8-N, Feb 09, 2008

  Focusing is still a little out despite using a home-made Hartmann Mask (made from a bit of grey closed-cell sit-mat), this is mainly due to the low-tech sloppy focuser supplied with the scope. I need to get it shimmed-up to take out some of the axial play. I had a look at a NGC 3628 (edge-on spiral galaxy in Leo), M45 (The Pleiades), M40 (double-star in Ursa Major) and M44 (The Beehive Cluster, also called the "Praesepe", in Cancer) before packing away before everything got dewed-up. The new tracking motors worked well, acceptably quiet and fairly accurate, although I've still to go through the Periodic Error Correction routine and I also need to refine the backlash settings. I've a minor cone-error on the scope mounting-plate which I'll correct as soon as I get the time.

OK, own up. Who was it?

Posted by at 11:20 am in LMAO!.

Harking back to the PayPal scam post, does it not say "Don’t follow the link"?

Well, according to the admin page, somebody did.

You just won't listen to reason, will you?

Maybe this will keep you amused:

bigred.swf


Thursday 7th February, 2008

Adapt to survive

Posted by at 2:50 pm in Astrostuff, Camera kit, Rambling on....
When I was in engineering and fabrication, there was this principle of standardisation. It was brilliant - it meant that things would actually fit together, you know, things like nuts would fit onto bolts, hubs would fit into alloy wheels, coins would be accepted by vending machines. It's a principle that we all take for granted. Well, I'm lost in a No-Man's land, surrounded by seemingly incompatible bits of camera and telescope. Sometimes things fit, sometimes they don't. Telescope bits are usually imperial (2" and 1.25" eyepieces, 8" mirrors etc. etc.) and cameras are metric. Wonderful. So, in order to get these things to mate, we have to bring in a third class of component... the adapter (adaptor) widget. It's amazing just how many of these damned things can be needed, even to the point where an adapter needs another adapter in order to achieve a union. Here are some examples: 1. Prime Focus (just a camera body on a scope): To fit a dSLR camera body (without lens) to a scope focuser needs a T-mount (item G) and either a telescope eyepiece-holder with a male T-thread (item A), or a T-threaded adapter that fits into the eyepiece holder. Simple, eh? Well, not so fast, boyo, let's look again. T-mounts are fun. One side fits directly onto the camera body, so you have to get the correct version for the camera that you intend to use (I needed the Nikon bayonet one for the D50). The other end of the T-mount has a 42mm female thread as standard across the range, and you woud be forgiven for thinking that, if you were so inclined, you could fit a 42mm filter/step-up/step-down ring, but you can't. You see, 42mm photographic filters and step-rings have a 1.00mm thread pitch, whereas T-mounts have a 0.75mm thread pitch. Brilliant. Anyway, then you might have a choice of eyepiece holder... if you've a dual-fit focuser, it'll accept either 2" or 1.25" fittings. I was lucky here - my scope came with a dual-fit focuser and a holder which has an integral male T-thread. Some don't. 2. Afocal (using the scope eyepiece and the camera lens): To fit a dSLR camera and lens combo to a scope focuser needs similar jiggery-pokery. This usually entails using the filter thread of the lens as the attachment point, using a different type of adapter. Let's look at a few of the options that I have at my disposal: First up: to connect the 18-55mm Nikon kit lens needs an adapter (item C) which clamps over the barrel of the 1.25" scope eyepiece (like item F) and which has a male 52mm thread on the end, this screws directly to the lens filter thread. Fairly simple, if you've got the adapter. Second, let's ditch the 18-55mm lens and try the 70-300mm instead. That's got a 62mm thread, so another chunk of precision engineering (a 62-52mm step-down ring, item H) is required. And so on for each different lens thread... you get my drift? Third, I've an Olympus non-dSLR digital camera (C730-UZ) which I want to try... that has an unthreaded lens that extends out of the camera body when in use, so fitment must be made to the body around the base of the lens housing, where there's a 45mm thread. This thread takes an extension adapter (Item I) which has the required 52mm thread at the end... confused yet? Finally, I've a zoom-eyepiece (item E) on order, this can be used optically on the scope without any hassle, but fitting a camera to it will be interesting - I've no idea if the clamp-on 52mm adapter will fit, and rumour has it that it has a special thread hidden away under the rubber eye-cup, this special thread is purported to be an M54, but at present I don't know if it's a standard or a special pitch. No doubt I'll need yet another damned adapter to get it to hitch to the lens. Time will tell which one's required. 3. Eyepiece projection (with the scope eyepiece, without the camera lens) Well, that's just a mash-up of bits of the previous two methods, it needs some sort of connection between the scope eyepiece and the T-mount. Another adapter, maybe? Surely not! Looks like it. I'll be leaving this method until I've got the hang of the others, I reckon. Oh, I forgot to mention one thing... all of the methods that employ a telescope eyepiece require you to have yet another adapter (an eyepiece holder, like item B) to fit said eyepiece into the focuser on the scope. Had enough yet? No? Well, I'll go on about filters. I've already mentioned photographic filters (the screw-on type, not the drop-in type), they have metric threads so that they can be screwed directly onto the front of the camera lens. Now, let's consider astronomy filters. Imperial threads. To fit scope eyepieces. 2" or 1.25". Horses for courses, as they say. Now, that's not too much of a hardship, but it would be cool to be able to use an astro filter, such as the light-pollution reduction filter (item D), on the dSLR when out and about taking night-shots without the scope. Alas, there's not much chance of that happening, as 2"-to-52mm adapters are as rare as rocking-horse shit. Not a clue what these bits look like? Well, here's a piccy to help you out. Of course, I've not pasted the images at a consistent scale... that would make things too easy.  

  It's all too much. I'm going for a lie down now. Later on, I'll post some pics of the things that can be constructed using these bits.