Tuesday 18th November, 2008

Hot Pants

Posted by at 10:56 pm in Shiny new kit.

So, did you look at the kit-list? If you did, you'll have noticed that I don't have a great choice of legwear. Montane Mojo shorts for the few days of summer (and for scaring kids and old ladies), and Lowe Alpine Schoeller trews (variant unknown - TKMaxx clearance stock) for the rest of the year. Together with baselayer LJs, windproofs and/or the shell-salopettes, they've been sufficient to cope with everything except the very coldest of the conditions that I encounter.

Well, now even that eventuality has been covered - after a renowned expert approved the choice, one pair of Mountain Hardwear Compressor Pants has been acquired.

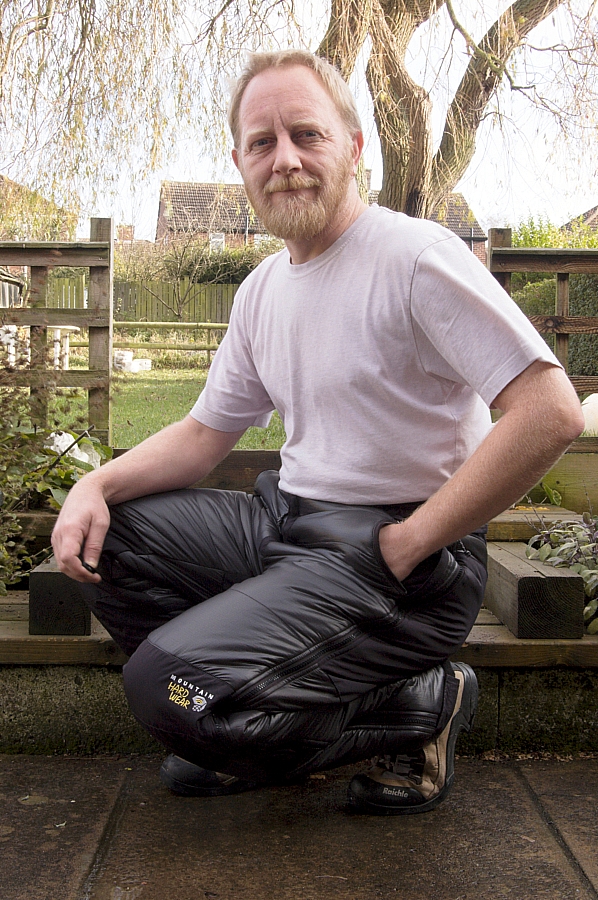
I bought these to cope with several scenarios... I'll wear them while standing/sitting outside with the scope during the freezing hours of winter nights and mornings, I'll take them on colder wildcamps so that after-dark wanderings aren't so chilly, I'm even tempted to try them in conjunction with a belay jacket, sleeping socks and a 2-season sleeping-bag in the winter. I've been experimenting with them, and I've found that they're a quick and easy fit over the shell-salopettes with no loss of loft, so I'll try them as the leg-wear equivalent of a belay-jacket.

They're not over-specced, but they have almost all of the features that I wanted:

  • Outer: Superlight 15D Ripstop
  • Lining: 30D Micro Taffeta
  • Reinforcement (seat and knees): Taslan
  • Double Velcro® waist closures with laminated tabs
  • Deep handwarmer pockets - zipped, microfleece-lined
  • Adjustable Velcro® ankle-cuffs
  • Articulated knees
  • Elastic waist with drawcord
  • Front zip fly
  • Full 2-way side-zips with internal baffles
  • Thermic Micro™ synthetic fill
  • Drawstring bag included

Mine (size m/m) weigh in at 590g without the drawstring bag.

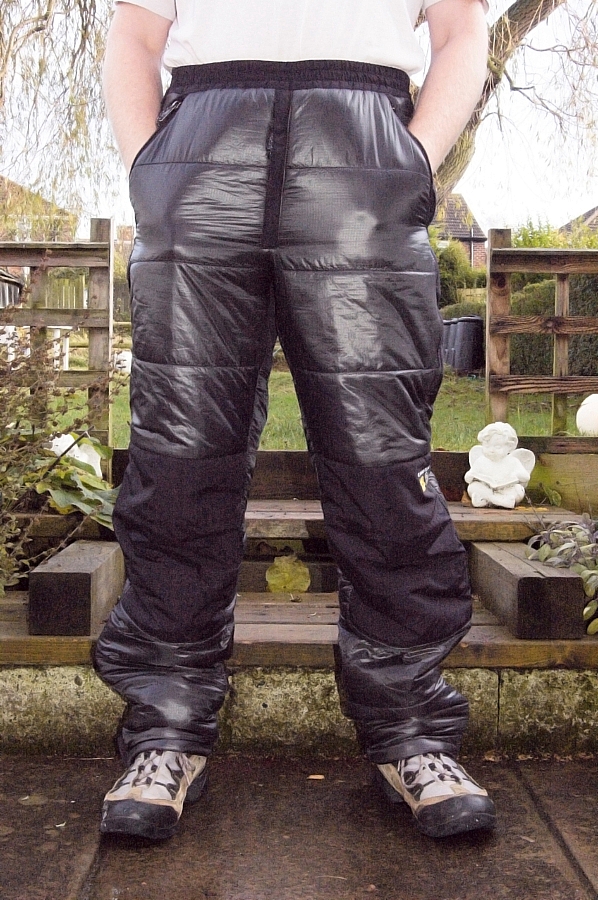
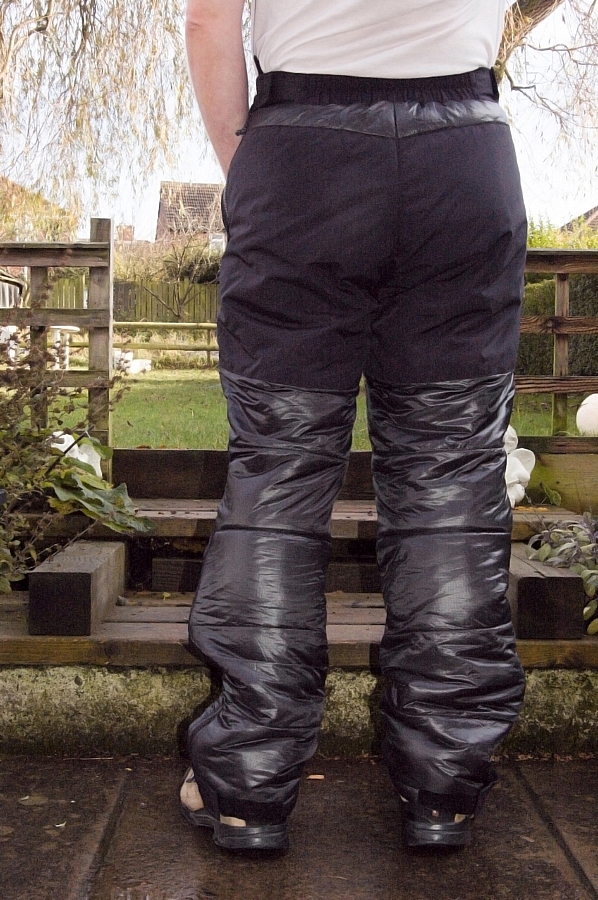
They're incredibly warm for their weight, and they don't restrict movement at all - the lining doesn't bind on midlayers, and is comfy over bare flesh. The only thing that's missing is a back-pocket, but I can cope without one.

And they really do make my arse look big!


Now all I need is a cold weekend wildie to put them to the test.

Thanks for your opinion, Petesy, it's much appreciated.

Hmm…

Posted by at 11:43 am in Shiny new kit.

I wonder what's in that little bag...

A jigsaw piece, perhaps?

Monday 17th November, 2008

The final piece of the jigsaw puzzle

Posted by at 2:18 pm in Rambling on..., Shiny new kit.

On Saturday I bit the bullet and parted with some hard-saved cash in exchange for what may well be the one item that completes my outdoors kit-list. The stash has been growing for nearly three decades, some of the original bits expired or were outgrown and have been replaced, some bits are still going strong, some are past their best but still perform adequately, but there's nothing there that I don't trust, nothing that I won't use sometime, and no gaps now that the final item is installed (to be fair, that item still needs to be tried and tested before it gets listed). All I have to do now is keep replacing the stuff that wears out... although if somebody was to donate a Therm-a-Rest NeoAir, I wouldn't refuse to take it 🙂

For those that have a hankering for kit-lists, mine's been updated and posted here. Seekers of bleeding-edge hi-tech or ultralightweight stuff will be generally disappointed. I've not listed the family-camping kit or the stuff that we've bought for the kids.

And that final bit of kit? You'll just have to wait a bit longer before I tell you about it and put it on the list.

Thursday 13th November, 2008

Get a grip!

Posted by at 5:06 pm in Shiny new kit.
Tags:

More stuff to try out. Not the most hi-tech bits of kit, but light (106g a pair), simple to use and at £7.90 a pair they're way cheaper than the alternatives available from Petzl and the like. I was so tempted to nab some of the cheap snowshoes at the same time, but managed to resist.


Bob’s Honey Stove – first test

Posted by at 1:07 pm in My reviews, Shiny new kit.
Tags:

OK, I found the last of the meths. Only 18ml, but it was more than enough to get the steel glowing and to provide sufficient raging flames to boil 0.5l of water in 3 minutes. I just let it rip, not bothering with the simmering ring, so a lot of heat was lost up the side of the mug, hence I'm fairly convinced that I could have been a fair bit more fuel-efficient. Here it is, sooting-up my nice shiny mug:


So, apart from the boil-time, what other info did you get? First, I can confirm the information provided in the instruction leaflet - the panels do warp when heated, but they do go flat again after they've cooled.  Even when warped, the top grill stayed in place. Second, in the temperate climate of my kitchen, the panels cooled sufficiently to allow handling within 2 minutes. Third, the tea's going down rather well 🙂

So, do you like it? Yes, very much. It's well-made, simple to use and very versatile. There's nothing to compare it with, as there's nothing quite like it on the market at the moment. I reckon Bob's onto a winner here.

Any more thoughts? Well, I've never had any need to take a shaving-mirror into the hills, but I'm sure that one of the nice shiny side-panels would suffice. Who knows, in dire emergency you could use one as a signalling-mirror. Oh, and those rows of holes in the side panels - they're ideally-placed for fitting a hanging-kit. I'll test the stove in a different fuel-mode as soon as I can spare the time.

Bob’s Honey Stove – first mods

Posted by at 11:42 am in My reviews, Shiny new kit.
Tags:

Right, before we start, I just want to say that these mods weren't necessary - it's just that I like to tinker with things to make them fit in with my personal intended use, and that use doesn't necessarily align with the intended modus operandi for the equipment. The unadulterated stove is clearly capable of being used with a Trangia™ burner, Bob's demonstrated that on his site, but I wanted it to work in a different manner, so I went out on a limb and did what I felt was in the best interests of what I wanted to achieve.

Anyway, I've wielded the tinsnips and the file, and now Podcast Bob’s new Honey Stove has been adjusted to suit my needs. Here's a summary of my mods:

What’s changed? I've notched the door panel and two of the five side panels as per the following pic:

Why? To allow the top grill to be removed without taking the sides apart. It can be lifted off quite easily, even when hot if you use a pan-grabber. The top grill had to be modded too.

Tell me more! In order to allow the top grill to sit inside the walls, I snipped off two of the five tabs, it now looks like this:

Will it still fit into the slots as per the original design? Yes, but with only three tabs it'll only lock into three slots. But you guessed that already, didn't you?

So, does it work? Yes. Remove the top grill and it's easy to access the Trangia™ burner'. Replace the top grill and it supports the mug. The top edge of the stove is still capable of supporting pans, and I've not altered the bottom edge.

Are there any other benefits? Well, the weight's been reduced by a massive 4g. OK, it's not much, but it means that I don't have to saw the handle off my toothbrush.

What next? It's time for a brew, if I can find the meths.