Archive for the 'Making stuff' Category
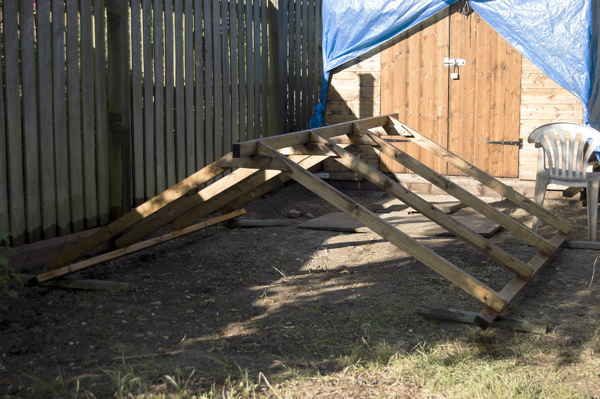
Observatory progress – Phase 6 continued
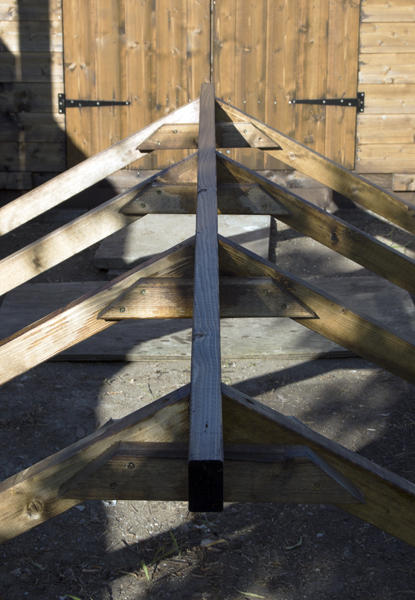
Yep, it fits, purlins and all:
Tomorrow I’ll get more nails for it and fix it on properly.
Pragmatism and Purism lose out to Painkillers and Purlins
The Coniston Fells rematch has had to be postponed due to my lack of confidence that my back will stay the course. It's a great disappointment on several levels, not least because I was hoping to take Ella with me for her first wildie. MWIS predicts that the weather's going to be really good over the weekend, so it would have been a great opportunity to introduce her to a couple of days and nights without most of the techno-trappings of life as she knows it.
Never mind, there'll be plenty of other chances.
It looks like I'll be taking it easy and finishing the observatory roof and the bathroom refurb instead.
There's no peace for the wicked, eh?
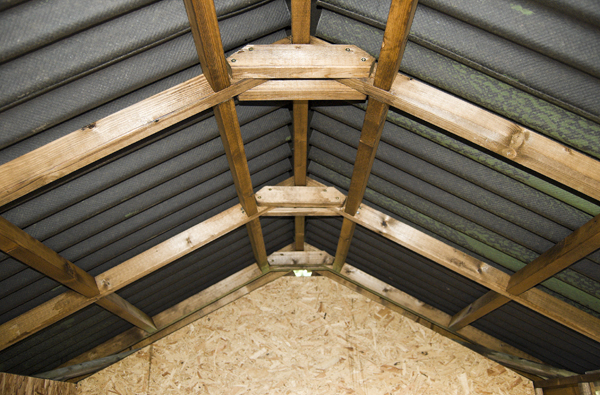
Observatory progress – Phase 6
OK, we now have the beginnings of a roof, thanks to the help provided by Ella during the last two days:
Tomorrow we'll see if it fits.
Observatory progress – Phase 5
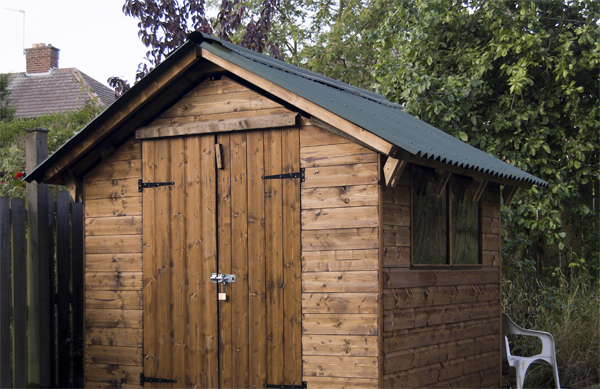
Construction of the observatory continues apace, mainly due to a complete disregard for the useless instructions included with the parts. Phase 5 is now complete:
The sides were double-proofed inside and out before assembly, and the few gaps have been filled with mastic. The walls are now up, square and level, cross-braced where required and fixed with many more than the recommended number of screws. The instructions said to put the walls onto the floor panels, but that's just mad - if ever the flooring had to come up, the walls would have to be taken down first, which would mean taking the roof off (if fitted). Commonsense said to put the walls directly onto the floor-frame (see previous post) and then fit the floor inside.
The supplied 9mm OSB floor-sections were dismantled and their boards, along with the 9mm OSB roof-boards, were used to line the inside of the walls.
A proper 18mm "waterproof" T&G chipboard panel floor was fitted, complete with a lift-out section surrounding the pier to allow easy access to the fixing malarkey and the concrete foundation beneath it.


The coming week should see the completion of Phase 6 - the fitting of the roof, which should be a masterpiece of timber over-engineering.
Time will tell.
Observatory progress – Phases 2, 3 and 4
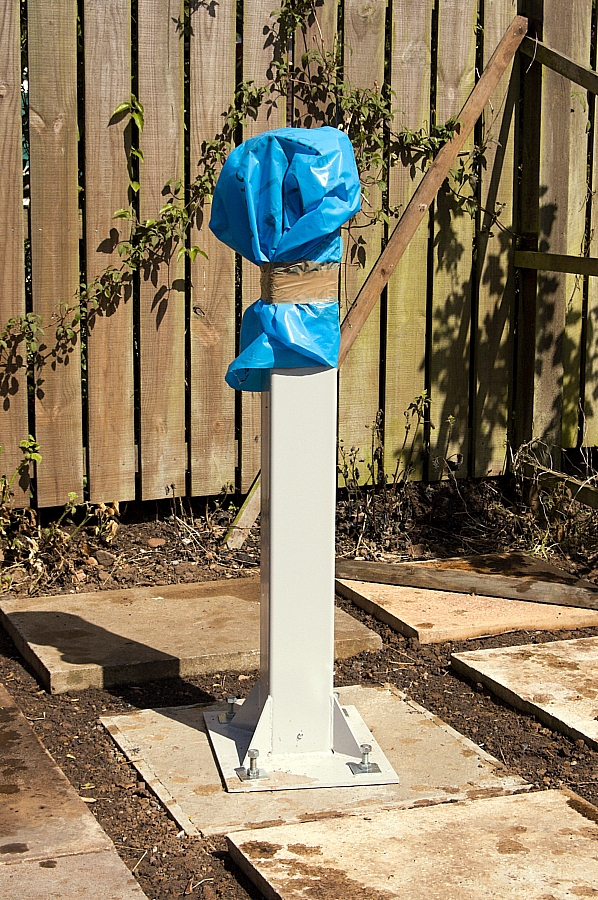
Readers may remember that Nick and I constructed a prototype telescope pier way back in December. If you want to see what it looked like at the time, the post is here.
Well, that was Phase 1, and since then there have been developments...
Phase 2 (the move from prototype to working sample):
First up, preliminary tests indicated that the dimensions were OK but the ad-hoc angle-iron mountings were inadequate. We knew that they would have to be replaced, as they were only used as a temporary measure in order to allow flexure, resonance and vibration-damping testing. As you can see, they've been replaced with something a bit more substantial.
Second, a large hole was drilled in the side to allow sand-filling to dampen any excessive vibes. We also put a few M6 tapped holes in the side to allow for any future need for attaching brackets, gadgets, earth-tags and other such things.
Third, the whole shebang (apart from the threads) was phosphated and powdercoated which looks neat and should preserve the thing for quite a few years.
Phase 3 (the installation of the pier) was completed a week ago. After the ball-aching job of making a deep and heavy concrete base (see here) the pier was nutted onto the set-in studding, and a base of old slabs was put down around it to support the bearers.Phase 4 is now complete - the construction of a sound raised floor-frame. To replace the somewhat inadequate floor that (eventually) came with the new shed, I made a frame of 4x2s which has been given several liberal coats of preservative. This frame sits on bearers (some old 3x3 fence-posts) which should last a few years before they rot. These bearers are not fixed, so they can be replaced one at a time if necessary - they cost nowt when "acquired" from the local tip.
Here are a few snapshots of the project so far:

The revised mounting-plate nutted to the studding in concrete base
The slabs have it surrounded!

The floor-frame supported by bearers (old fence-posts)
Phase 5 will be interesting - it's the bit where we assemble the shed walls. Now, if only I had a full set...