Archive for the 'Making stuff' Category

Some like it hot

Posted by on June 26th 2014 in In the garden, Making stuff
Tags:

During the spring of 2013 we erected our "see if we get on with it" cheap polytunnel and we had a reasonable crop from it.

The only worry was durability - the frame was solid enough but the cover's stitch-work left a lot to be desired, and one of the window-flap's zips had gone a knacker within a couple of weeks.

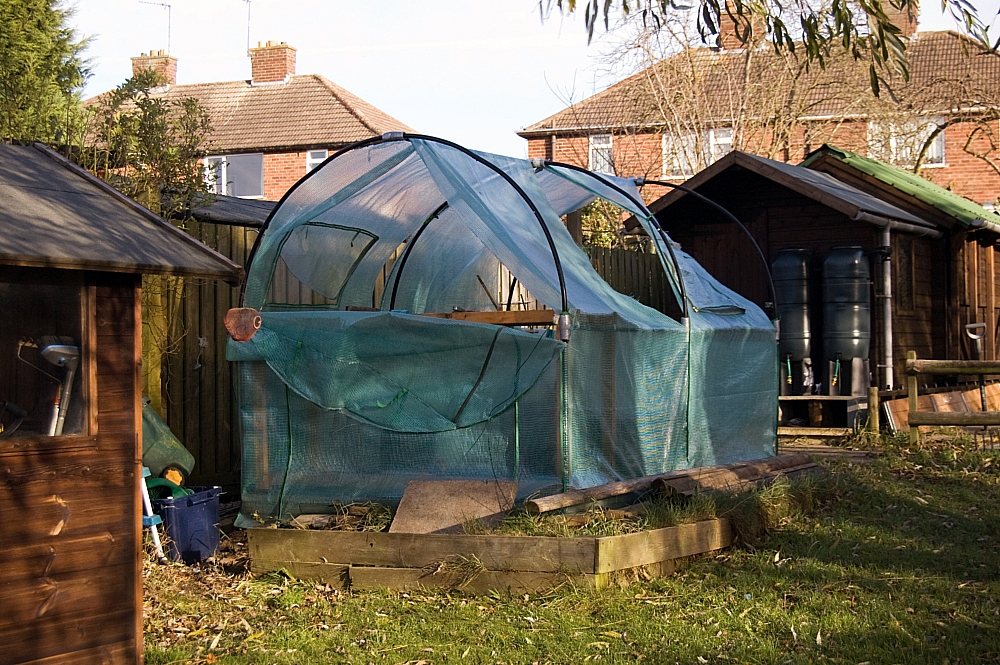
Sure enough, it didn't survive to see this spring. One windy day in December totalled the thing within an hour:

We needed something better. We considered traditional framed jobbies but rejected them on the grounds of vulnerability - I didn't fancy the prospect of having to replace glass or plastic panes after they'd been speared by twigs and branches from the nearby Salix babylonica. Proper polytunnels were considered but the site is unsuitable for trenching-in the edges of the single polythene sheet covering.

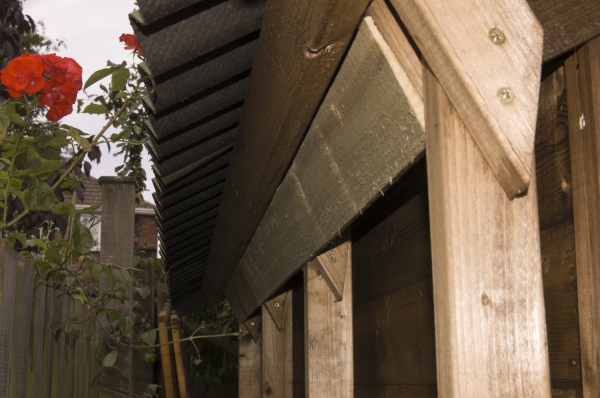
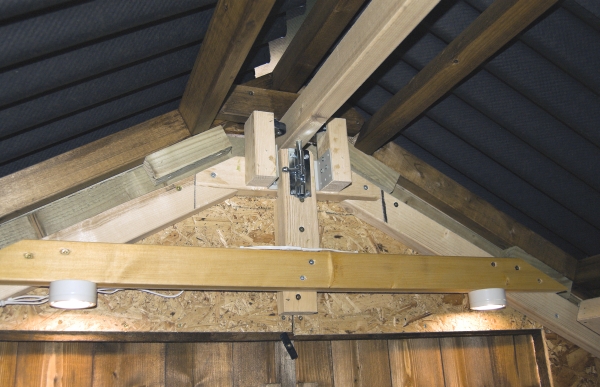
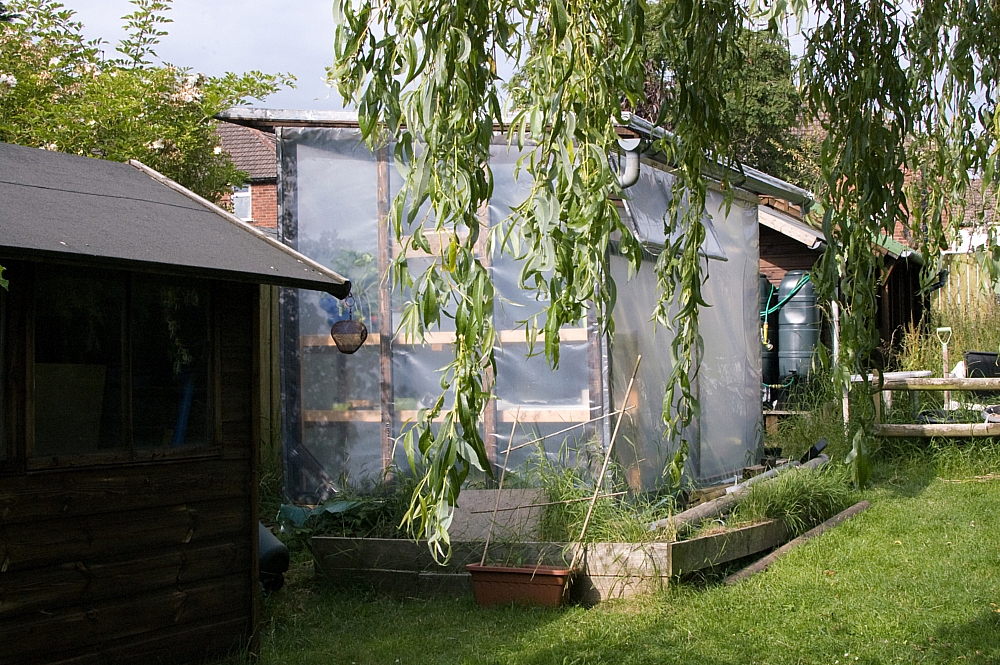
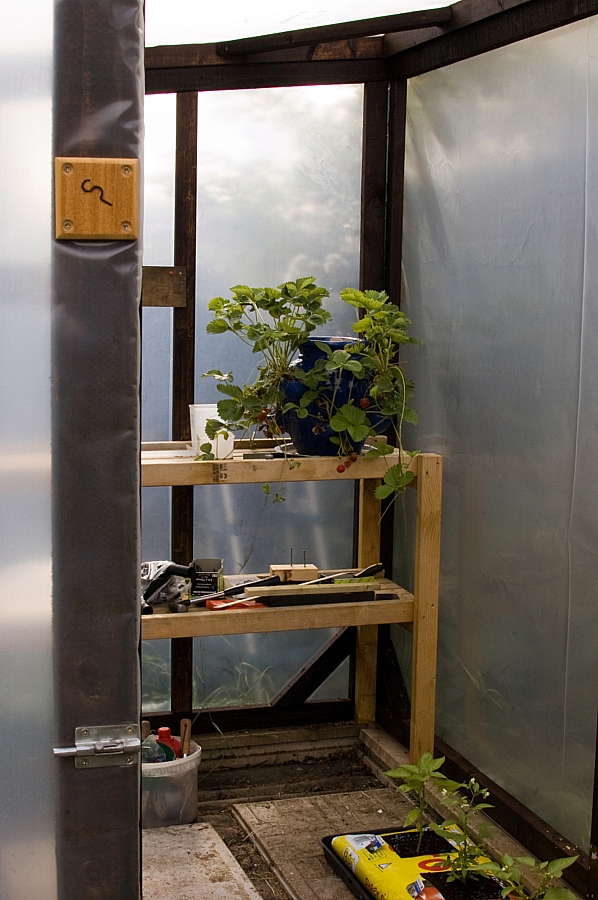
In the end, after much "back-of-a-fag-packet" doodling, we settled on a hybrid design of five separate timber-frame panels covered with polytunnel-grade sheeting. Any one of the five panels can be removed for repair, and we can slip in simple extension panels if SWMBO decides that 3m x 2m isn't enough - the roof panel is oversize so we could go up to 3.5m x 2m if instructed. FWIW, I'm not planning to extend the height - IMO 2.2m at the lowest point is quite enough.

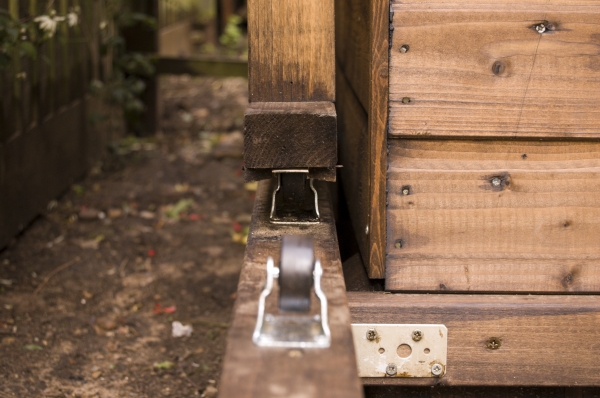
It took me and Chris (our helpful over-the-road neighbour) about a week to cut and creosote the timber and fabricate the frames, and another week to cover, staple and tape them. After that, the final assembly was a doddle.

It's been up and running for a couple of weeks now, the only thing still on the to do list is the guttering/downpipe/water-butt system. We've already got a list of possible future improvements (decking, trickle-watering, polycarb roofing) but that lot can wait until after the running-in period has exposed any unforeseen flaws.

It won't win any prizes for elegance but functionally it's excellent and maintenance should be a breeze.

You'll be wanting some pics, I suppose?


Now I suppose I'll have to sort out the rest of the garden 🙁

Oh, and just in case you were wondering about costs...

  • 3x2 timber for frames ~£100
  • Misc. timber for windows etc. ~£20
  • Decking screws ~£10
  • Polythene sheeting ~£50 (enough in reserve for a full panel re-cover)
  • Mesh for windows ~£10
  • Tape for edges  ~£15 (plenty in reserve for minor repairs)
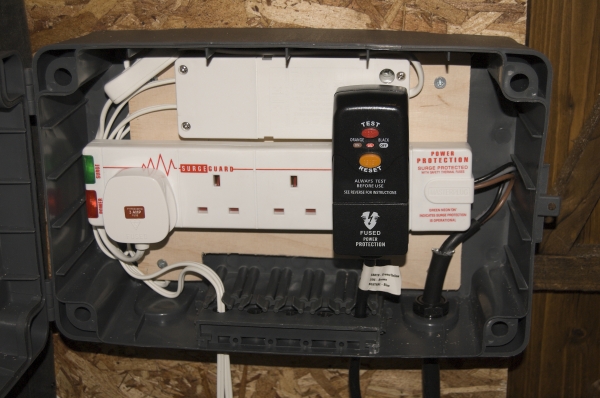
  • Misc. fittings ~£20
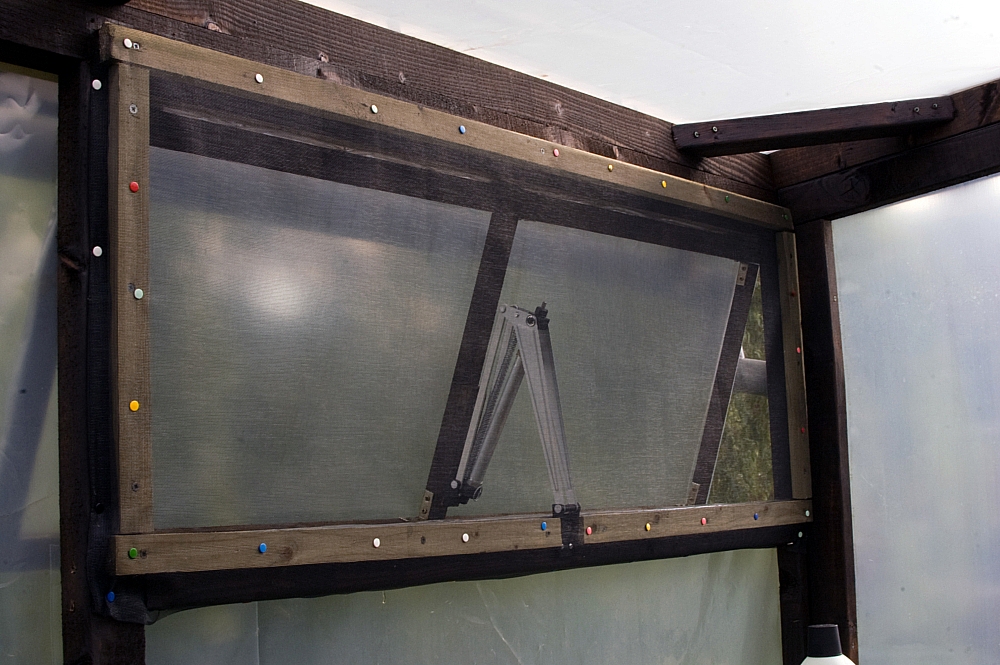
  • Auto-vent gadget ~£20
  • Guttering, staples, screws, door-bolt and a neat wooden monogram plaque - donated by Chris
  • Help from Chris - free and invaluable, I can't thank him enough

Lembas

Posted by on May 5th 2013 in Just for fun, Making stuff

Ingredients:


Method:


Product:


Result!


Calories: 1810 (cake mix) + 460 (4 x Curlywurly) + 480 (Sunflower Oil) = 2750.

My calorie RDA: ~2500.

I can't see the cake lasting until morning.

Observatory progress – warm-room nearly finished

Posted by on November 13th 2011 in Astrostuff, Making stuff, Projects

Done on the cheap...

  • Second-hand slabs from eBay for the base
  • Free old second-hand shed for most of the walls (thanks to Brian)
  • Free reclaimed chipboard for the roof, inside and out (thanks to Paul)
  • Free reclaimed MDF for lining the walls (thanks to Marc)
  • Free reclaimed 8" x 1" T&G planks for the floor (thanks to Geoff)
  • Free second-hand carpets (thanks to Mum and Dad)
  • Free cadged off-cut of kitchen worktop for the work-desk (thanks to Graham)
  • Even the creosote was bartered from my neighbour, in exchange for some unwanted roofing-felt (thanks again to Paul)
  • Oh, and free quality-control, tea-making and labour (thanks to Graham, Geoff and Ella)

Had to shell out for felt/primer/adhesive, some four-by-twos for the floor frame, a few bits of ship-lap cladding from the timber-merchant, dirt-cheap loft-insulation for inside the walls and ceiling, some cheap lighting from Ikea and some other sundry electrical bits.


It's usable now but there are a few things still on the to-do list:

  • Fit the cadged-for-free reclaimed guttering/downpipes to direct the run-off into water-butts
  • Paint the inside, using up old paint that I have in the attic
  • Get the old kettle from the attic and install it
  • Get shot of the set of encyclopaedias that we didn't have the heart to burn on bonfire night

Maybe soon the weather will be suitable for using the place for sky-watching rather than book-storage.

Observing Report 21st July 2010 (Sunspots in Active Region 1089 – Session 1)

Using some black plastic sheet, some Meccano fasteners, some Superglue, some sticky-tape, a Cornflakes box, a cardboard tube and a pair of Val's old knickers, I constructed a safe solar filter using the some of the Baader AstroSolar Safety Film that I got for my birthday. It fits securely over the front of the C80 refractor:


OK, so I lied about the box, the cardboard tube and the knickers, it turned out that I didn't really need them :mrgreen:

Anyway, it needed testing properly so I nipped up to the obsy and grabbed some .avi footage of Active Region 1089, where there is an impressive array of sunspots. After processing in K3CCDTools3, Registax and PSCS3, I've ended up with the following two images which are essentially the same except for the application of a little equalization in the second image:

Sunspots in AR1089 (21/07/2010).
100/1000 stacked frames.
DMK mono CCD camera on the C80ED-R.

 As previous but equalized in PSCS3


I'll try to get more footage of this thing over the next few days to see how it changes. I'll probably use a bit of the leftover solar film to make filters for the D50's lenses, and then get some full-disc shots.

BE WARNED: Never view the Sun without a suitable Solar Filter! Solar observing is dangerous and can be hazardous to eyesight and equipment. Don't moan at me when you've burned holes in your retinas, set fire to your person/possessions and/or fried the chip in your camera. Proper solar-observing kit comes with serious safety advice - ignore it at your own peril!

Package 1

Posted by on July 11th 2010 in Astrostuff, Making stuff
Tags: ,

You'll recall that during my previous observing session the link between my focuser and my SkyWatcher Auto-Focuser stepper-motor broke. Here's a pic showing the setup, the link is the 2-part ally gubbins that links the drive-shaft of the stepper-motor (on the right) to the shaft of the focus-adjuster (on the left):

Here is a couple of shots of the offending article:

It works in a peculiar way... the small end is attached good and proper to the shaft of the focus-adjuster by means of a grub-screw that clamps onto a flat on the shaft. No problems there. The attachment to the drive-shaft of the motor, however, is rather odd. It works by friction, using an internal O-ring that is compressed around the shaft by screwing together the two parts of the link. It doesn't like changes in temperature (too warm and the O-ring deforms and spins, too cold and it contracts and doesn't grip tightly. Oh, and there's always some flex and hence backlash due to the "flexible" nature of the O-ring/shaft connection. It was destined to fail, and indeed did so.

So, a better-engineered solution was required. Something so simple that a child could use it.

Step forward Package 1. This contained a good-old-fashioned Meccano 4-hole brass coupling:

As supplied, the fit to the focus-adjuster shaft was perfect. The motor drive-shaft, however, has a larger diameter, so I had to run a drill-bit half-way down the coupling to open it up a tad. From then on, fitting it was child's play, using proper screws to attach to the flats on both shafts.

Now it's a good and solid link, just as it should be, with no chance of slippage and no backlash due to the motor torquing itself against any resistance from the focuser.

In short, it's a proper job:

Observatory progress – Phase 7 – The last few bits

Posted by on June 18th 2009 in Astrostuff, Making stuff, Projects

I've received a few emails from folk asking how much more needs doing to the astroshed, and indeed wondering why it doesn't fall to bits, go off the rails or just refuse to close due to misalignment. Hopefully the following pics and text will be sufficient to answer such probing questions:


In order to allow the scope to fit inside in the "parked" position, the roof sits a good three inches
above the shed walls to give sufficient clearance.The resulting gap has been covered with a couple of
rows of feather-edge timber, fixed to the roof. Regarding the other stuff in view, a neighbour kindly
donated some carpet and I dug around in the attic to find the 1960s coffee-table.
The plastic chair is just one of many that Chris wants me to take to the tip.

Another row of feather-edge timber creates an overlap twixt shed-walls and roof-frame on one of the long sides.
This setup is weatherproof but still allows good airflow to minimise condensation.

The wheels are cheap 40mm fixed castors, the channel is a strip of plastic conduit braced with some spare stripwood with chamfered ends.
The castor-wheels have sufficient sideplay to allow for a reasonable amount of flex/warp of the runner.

The leccy's all sorted out, with IP55 or better fittings throughout for anything mains-related,
and with power being supplied via an RCD-protected steel-armoured cable circuit...

... which means that the cheap Ikea low-voltage halogen lamps above the doors are now up and running.
Also visible above is the guide-wheel arrangement that ensures that the guide-rail fixed beneath the ridge of the roof
is always central when the roof is closed or in motion. The barrel-bolt serves an obvious purpose.

Here's a view of the guide-wheel arrangement at the other end of the shed.
The guide-rail is chamfered at the end to ensure that it always ends up between the wheels.

At the moment there isn't much wiring around the pier, but I'm sure that after a few weeks the thing will be festooned with all sorts of gadgetry.
I'm aiming to have just the one "in" cable (for power) and one "out" cable (for data (USB)).

The planned change to the window-wall has been completed - the windows have gone, to allow a better view to the south.
A "mock" panel has been fixed to the moving frame, the results are shown below:

This means that there's now no need to conform to the standard idea of having the upper section of the southern wall on a hinged flap.

As you can see, there's plenty of "gap" to look through.
I knocked up a small removable roof-panel (visible just behind the scope) which serves several purposes -
it's a draught-reducer, it provides shade from the night-lights at the old folks' home just up the way,
and it prevents the neighbours from peering over the fence to see what's going on.

So, it's about finished. The kettle and the beer-fridge will go in when I've put up shelves for them.
The only thing still needed is a small fire-extinguisher.
That, and some clear nights so that I can get on with some observing.